【爱克斯开发板试用】开发板PVC外壳定制&&基于OpenCV+Tensorflow验证码识别,
 openlab_14772980
更新于 2年前
openlab_14772980
更新于 2年前
一、前言
感谢蓝蛙智能为我们提供这样一次试用机会。AIxBoard(爱克斯板)是英特尔开发套件官方序列中的一员,专为入门级人工智能应用和边缘智能设备而设计。爱克斯板能完美胜人工智能学习、开发、实训、应用等不同应用场景。其上默认搭载OpenVINO工具套件,CPU、iGPU都具备强劲的AI推理能力。
二、产品外观
本人收到后就先拍了张照片(图1),可看出来板子非常小,和我一个手差不多大。大家收到后请把螺丝安上去,因为我好像开机后用手不知道碰到了哪个地方,板子就重启了。发现还能开机,但是系统进不去了,不知道坏没坏。然后我就重装了个ubuntu系统,哭泣。
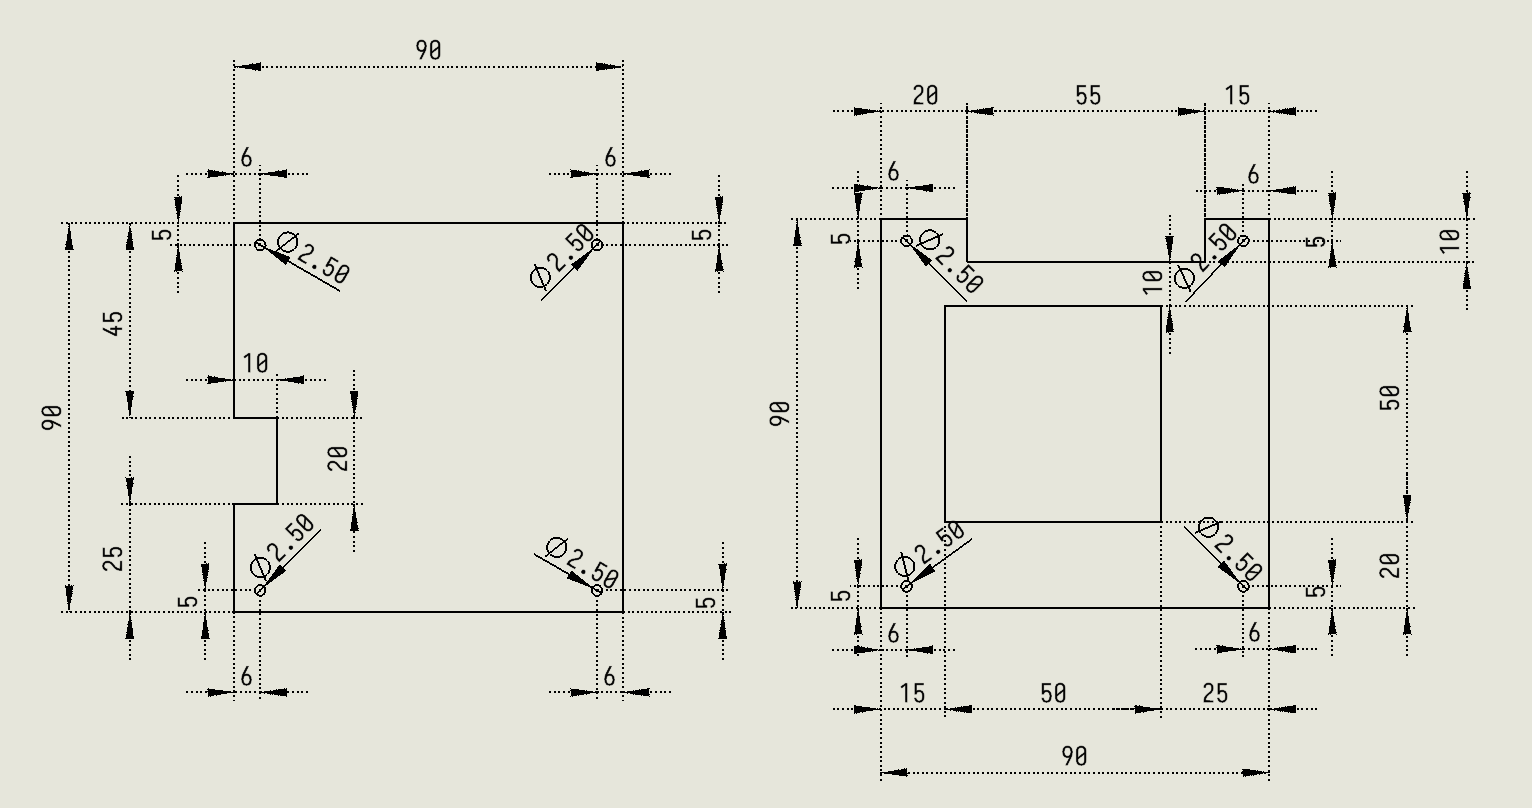
痛定思痛,我决定为他量身定制一个支撑版,这里直接去淘宝上搞PVC版子加工,但是螺孔精度需要达到2.5mm,所以先问一下老板哦。这里把我画的图纸发给大家。加工费20元左右差不多了,找我py可以便宜一点。想要原工程文件的请关注我的公众号“小小瑜科技”,回复“爱克斯板图纸”。
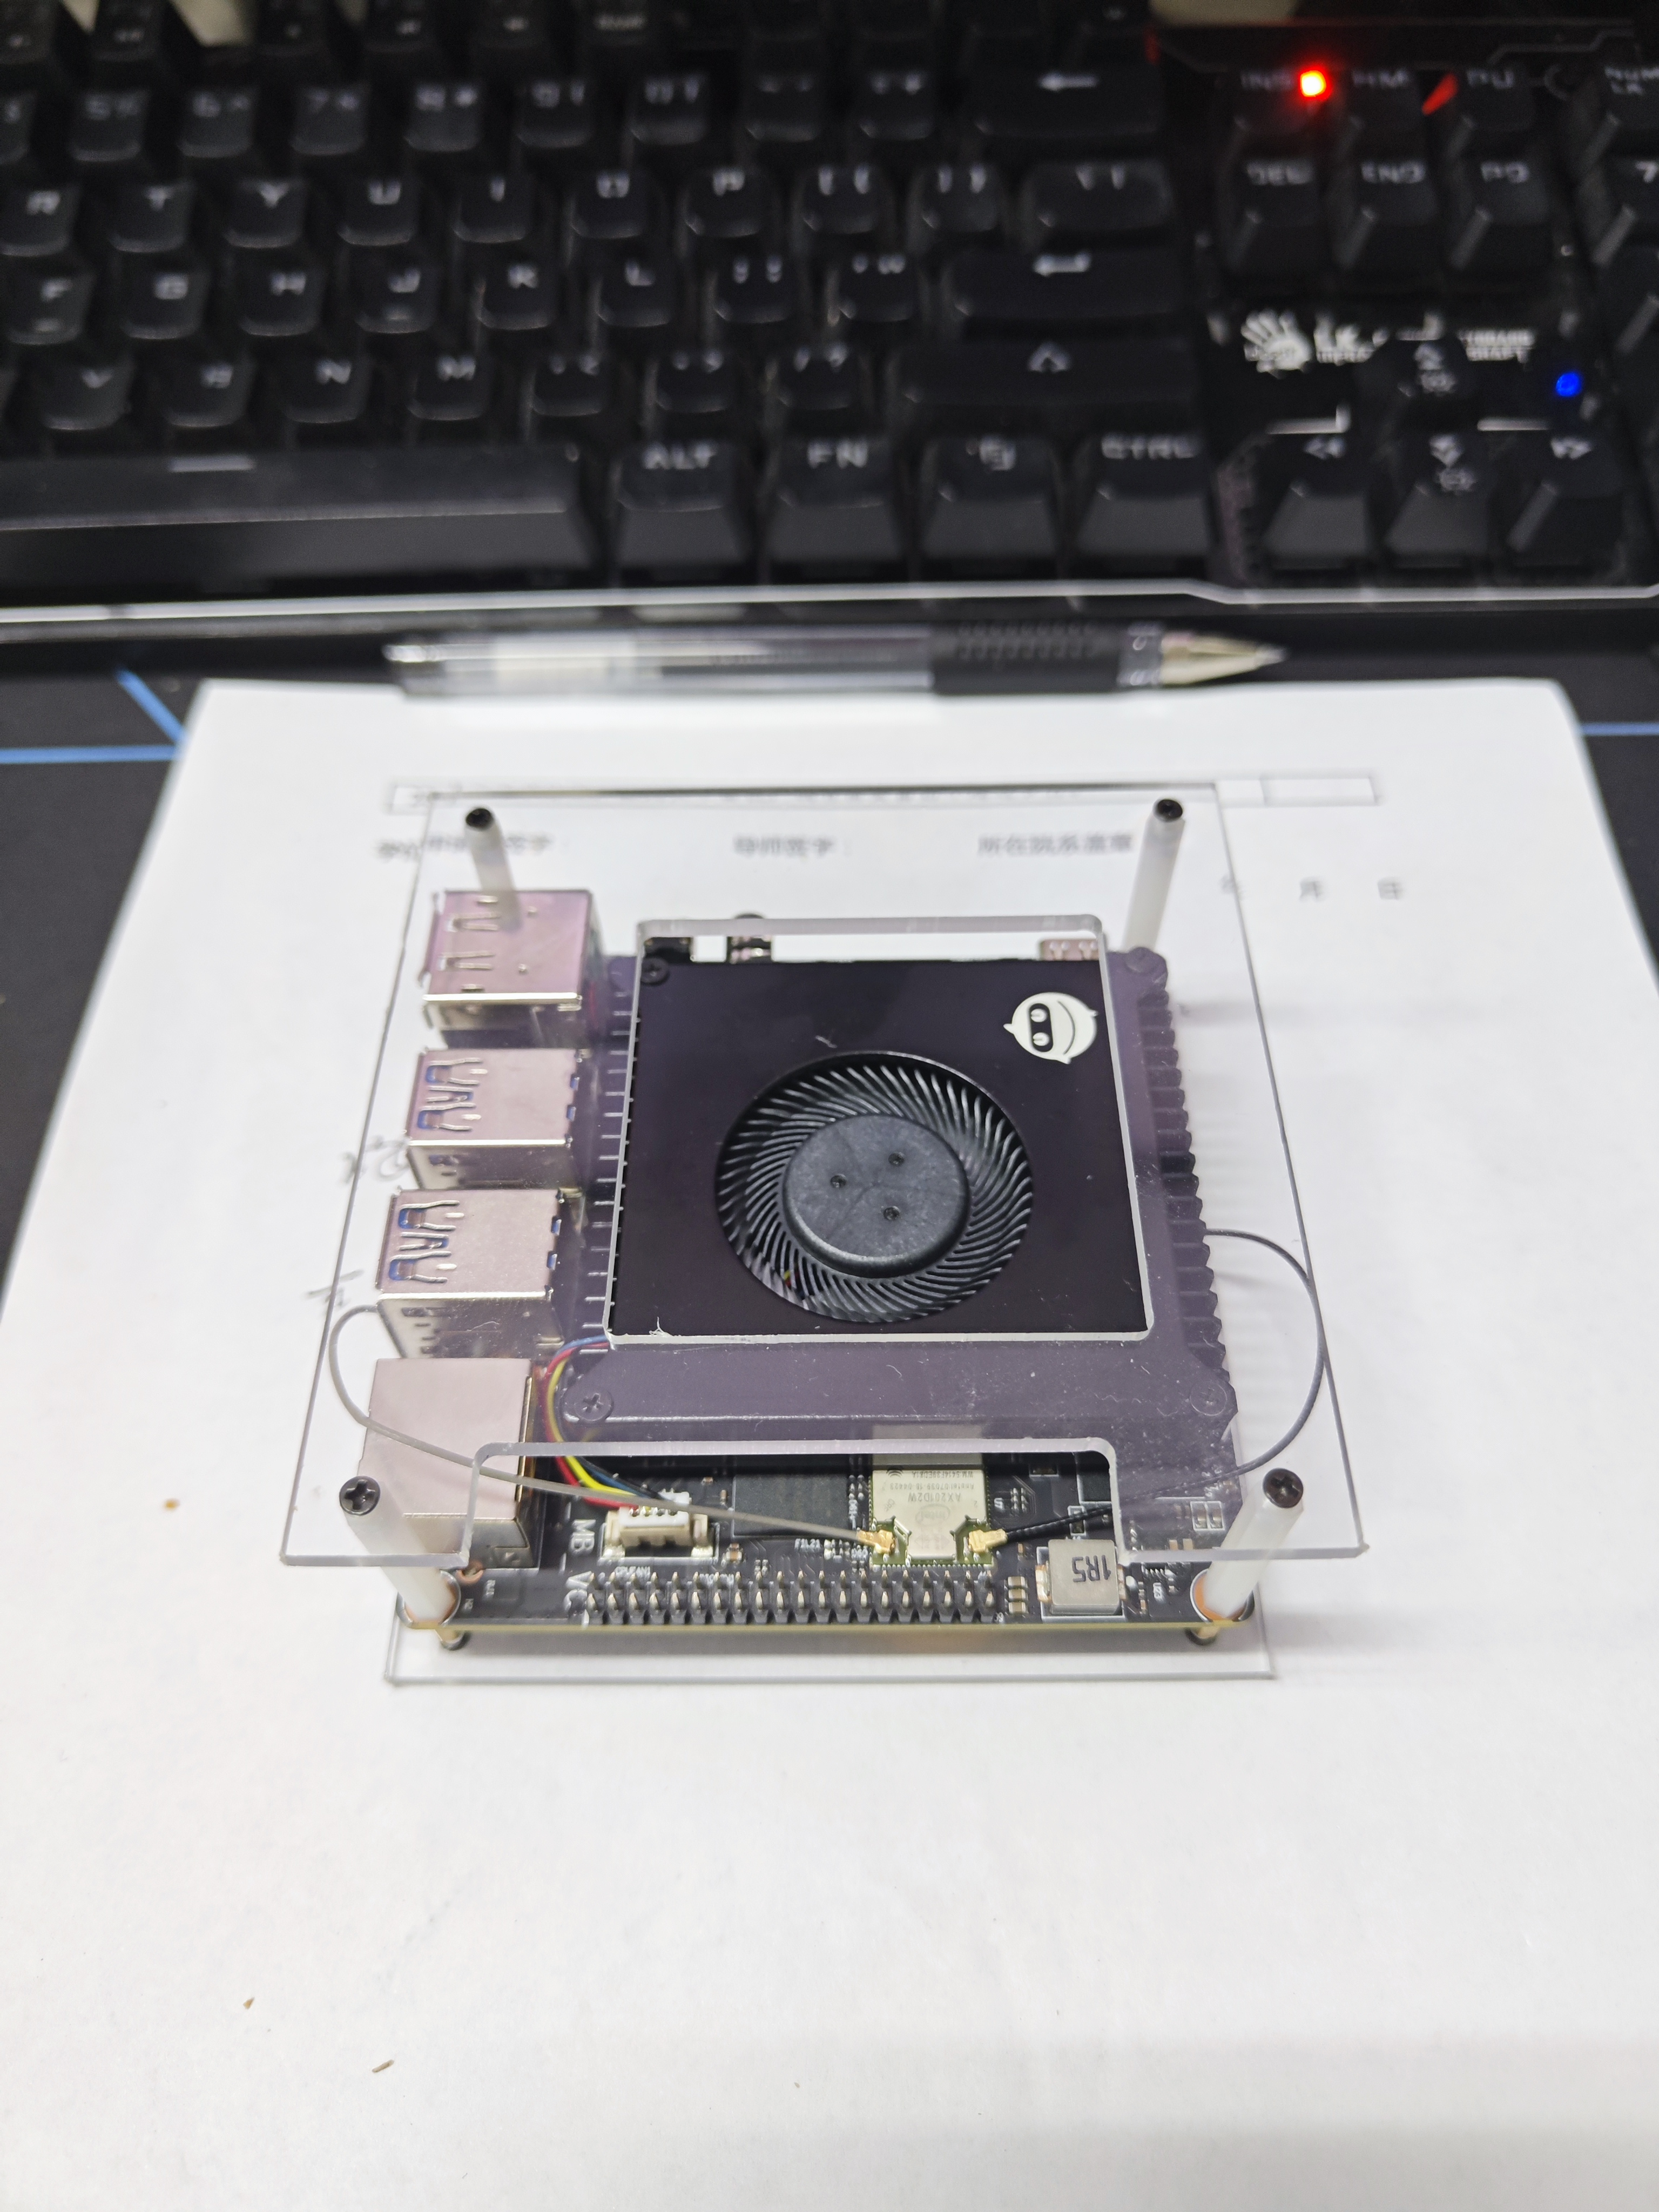
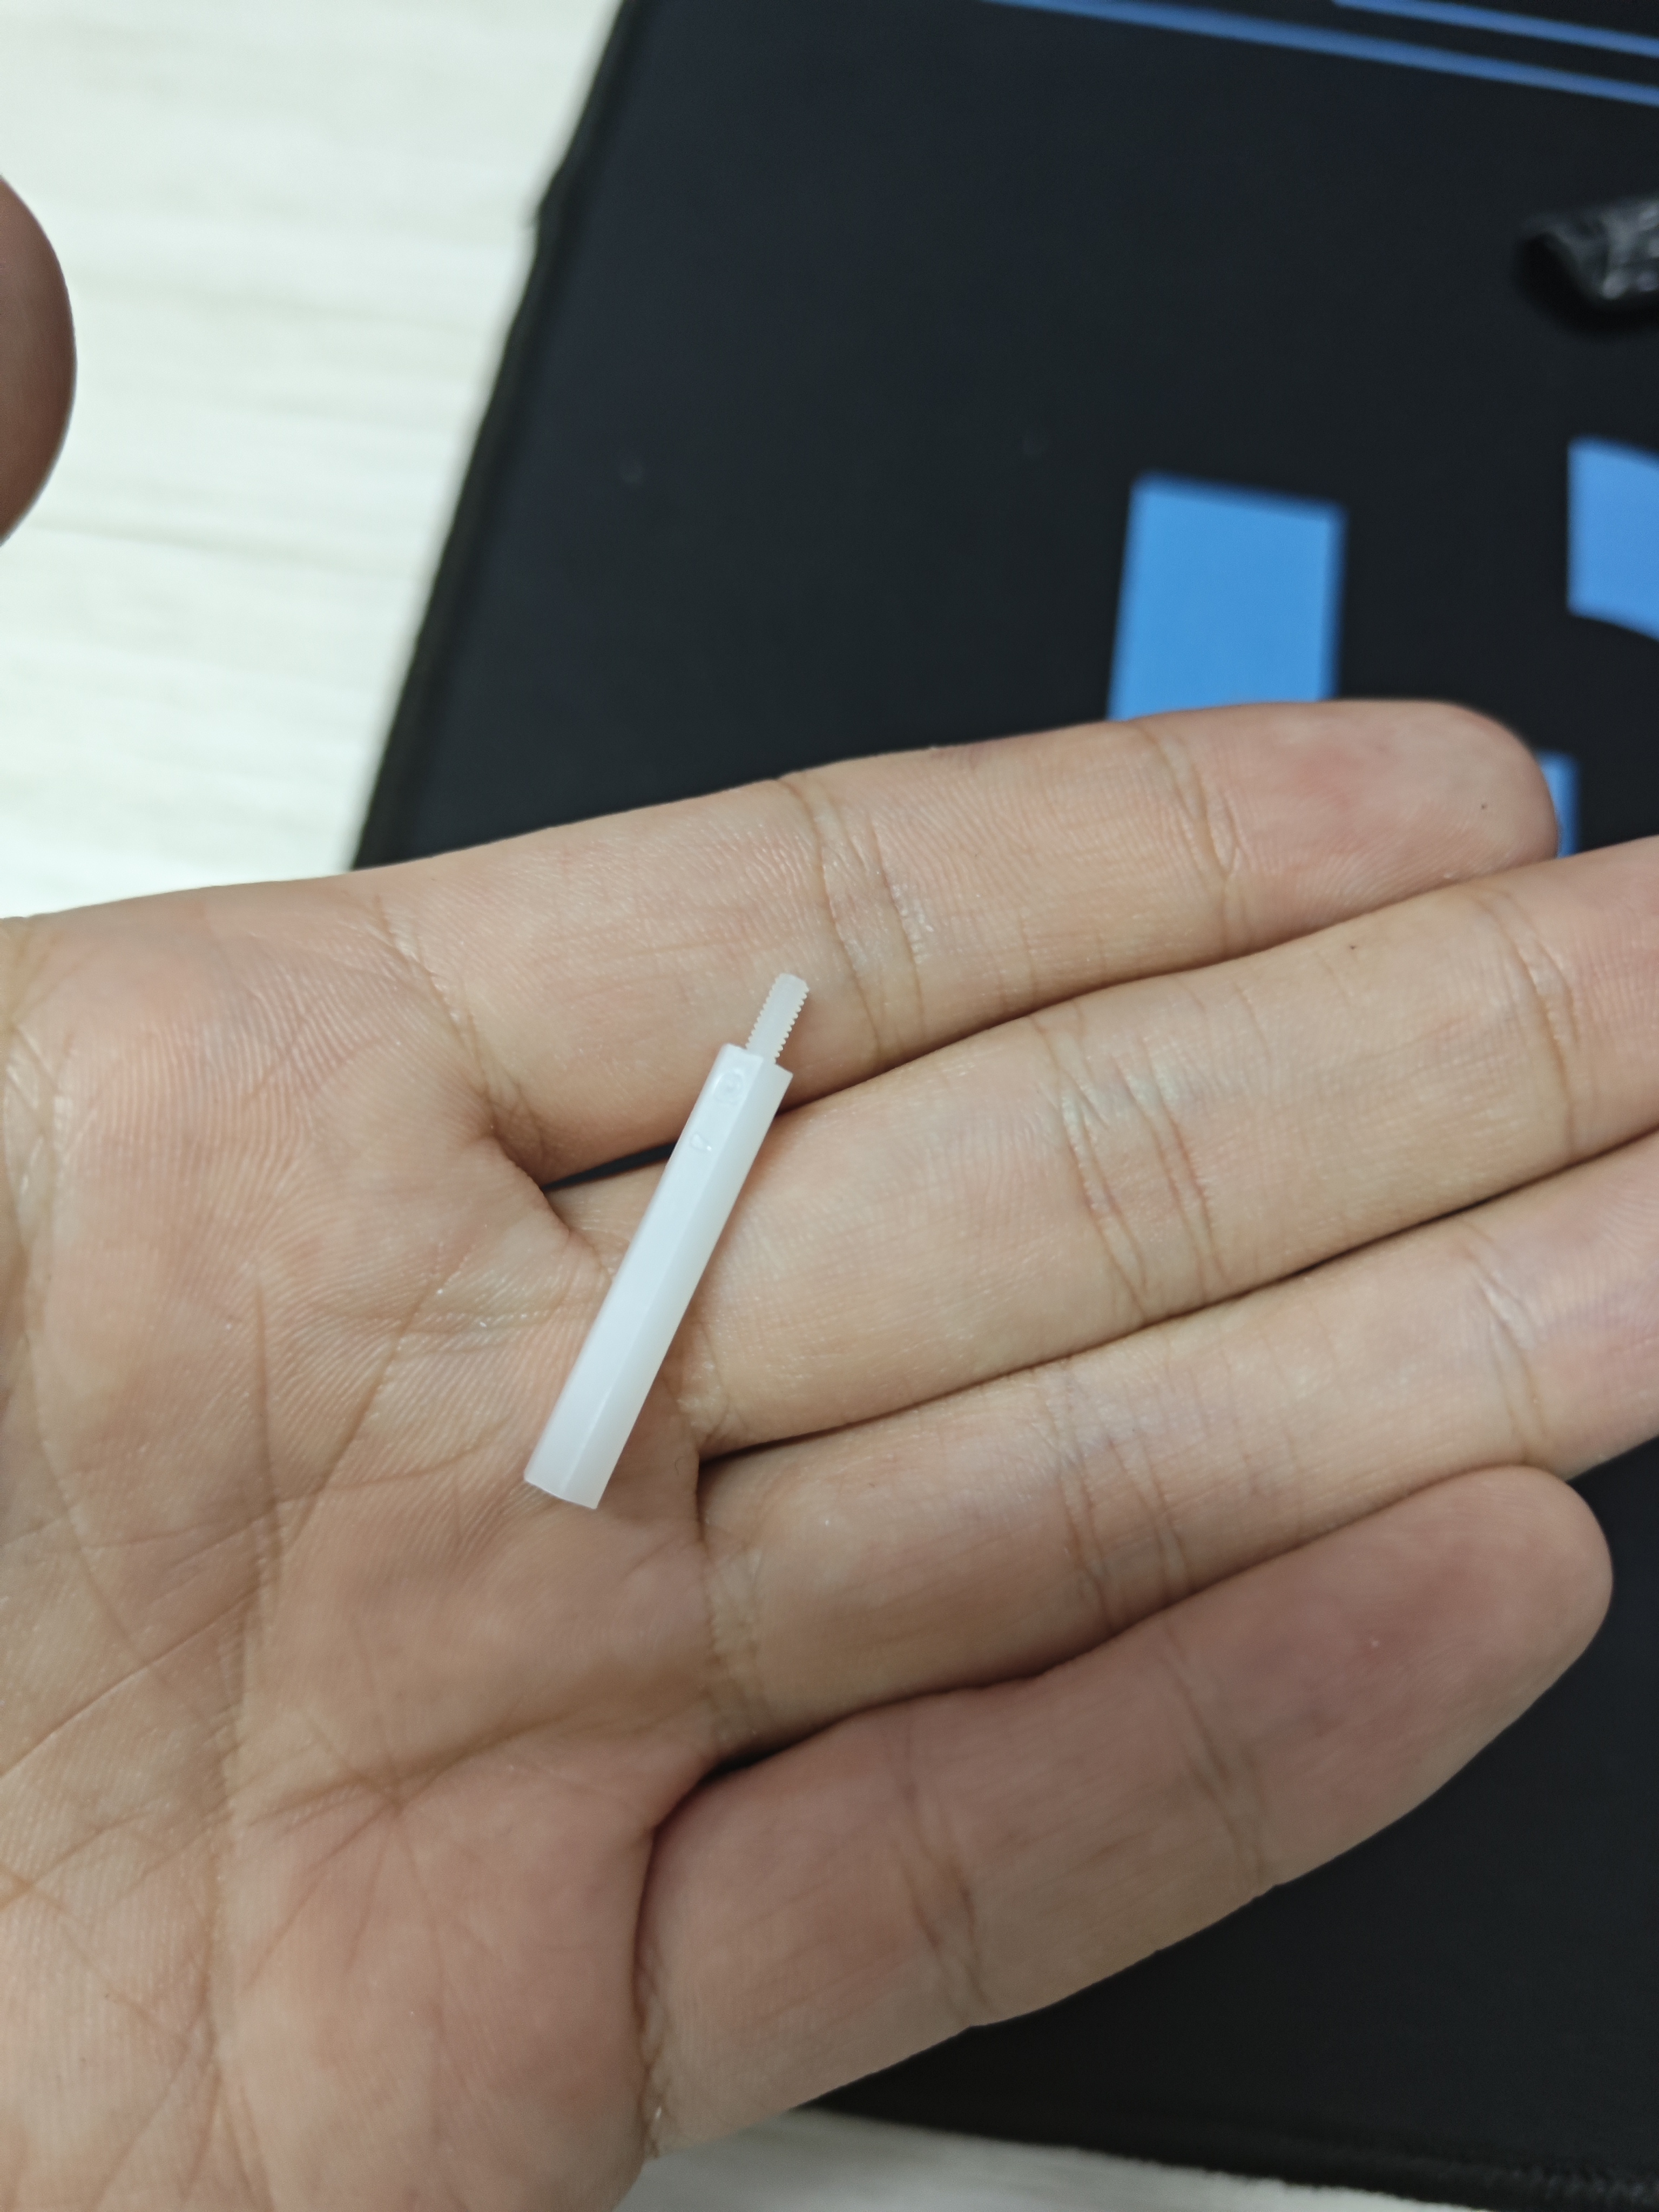
最后再上一张成品图,中间的2mm*20mm(手里拿的是2mm*25mm的,会高一点.)的螺柱和4个额外的2mm的螺丝记得自己买哈:
三、软件试用
1、51openlab课程学习
其实我申请板子的时候还不知道Intel OpenVino是什么东西,随便把他写上去了。然后拿到板子的时候,我注册了账号,在https://www.51openlab.com/platform/curriculum/list/里面看到了很多课,就学习了一下openvino。最后发现他里面包含了有很多现成的工具,十分厉害。本身该板子性能就属于嵌入式开发板,但是在该软件包的帮助下,竟然可以进行实时的视频处理任务。不得不说,让我这个刚入门小将还是感到惊讶的。
而且课程中间还配套了很多云服务器,供我们实时编写代码,真的方便。
2、AIxBoard(爱克斯板)资料学习。
资料学习网址:https://www.xzsteam.com/docs/index.html
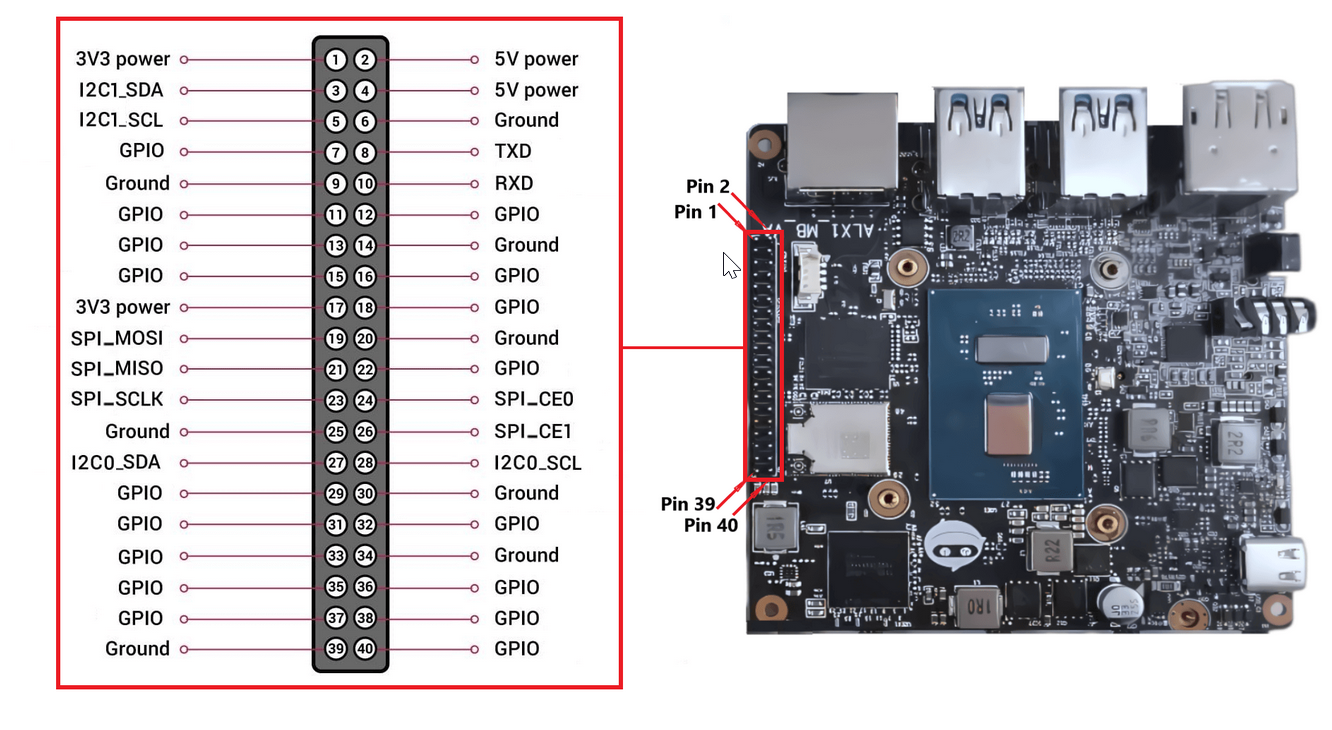
学完了之后,我感觉这个板子比PDD上买的同样规格的板子好太多了。首先是内存大,其次支持4个USB 3.0.还有,也是最重要的,就是他支持40个IO口,那以后就可以加上很多物联网功能了,美滋滋。
四、项目实战——基于OpenCV和Tensorflow的验证码识别
1、目标网站
xxx大学微纳平台,由于实验平台使用时长有限,故需要常常去抢订。其预定页面有很多基于django-recapcha插件生成的验证码,由于其加了高斯模糊和图像旋转所以通用验证码识别软件很难识别成功。已经试了网上常用的Tesseract OCR 和 带带弟弟OCR。主要原因是因为图像的旋转以及符号的识别率低,所以必须得自己训练网络。
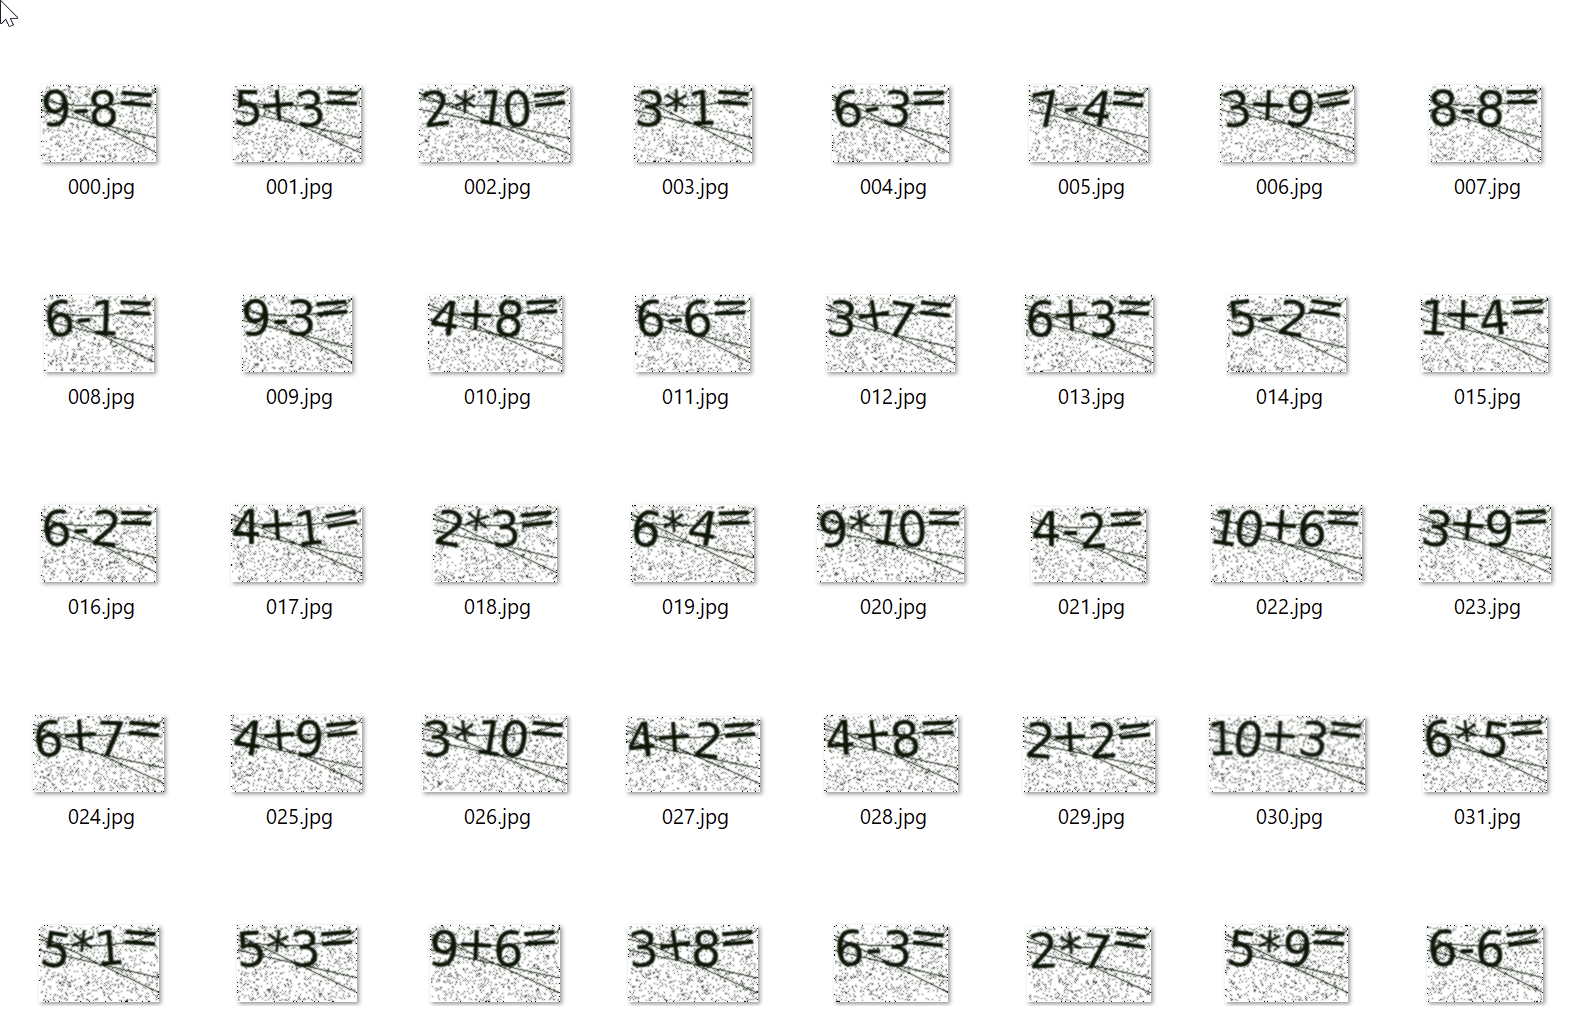
2、图像爬取
这里注意两点,网站有一定的反爬措施,所以要加上UA,以及当response状态码不是200时要休息30s。同时,对于图片类信息,request.get的stream为true。
import requests
from PIL import Image

from bs4 import BeautifulSoup
from io import BytesIO
import time

headers = {"User-Agent": "Mozilla/5.0 (Windows NT 10.0; Win64; x64; rv:109.0) Gecko/20100101 Firefox/109.0", "X-Requested-With": "XMLHttpRequest"}
img_refresh = "http://xxxxxxx.xxxx.edu.cn/captcha/refresh/"

for i in range(200):
    i = i + 100
    get200stop = True
    while (get200stop):
        print(i)
        r = requests.get(img_refresh, headers=headers)
        if (r.status_code == 200):
            get200stop = False
            image_url = r.json()["image_url"]
            capurl_all = 'http://xxxxxxx.xxxx.edu.cn' + image_url
            r = requests.get(capurl_all, stream=True, headers=headers)
            if (r.status_code == 200):
                r.raw.decode_content = True
                with open("./img/" + str(i).zfill(3) + ".jpg", 'wb') as f:
                    f.write(r.content)
        else:
            time.sleep(30)
    time.sleep(1)
下面展示成果,吃了一顿饭的时间就爬完了就可以了。
3、图像分割与标注
由于涉及到抢票时的性能问题,所以我们决定使用神经网络进行分割,而是采用传统的OpenCV方案。
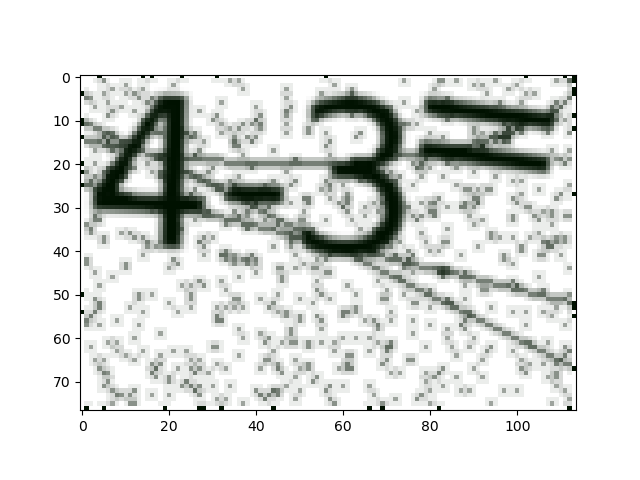
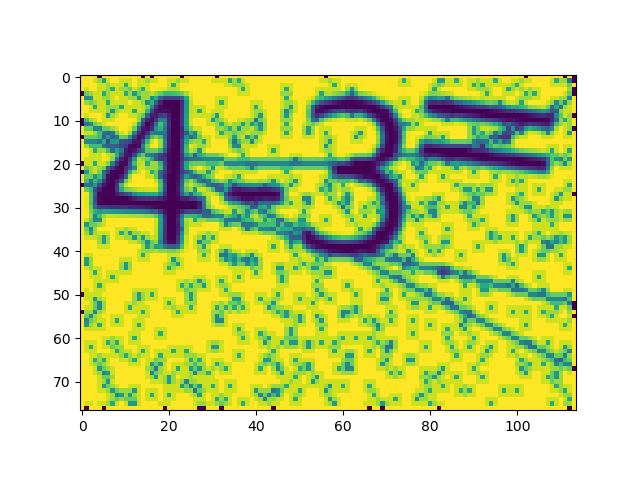
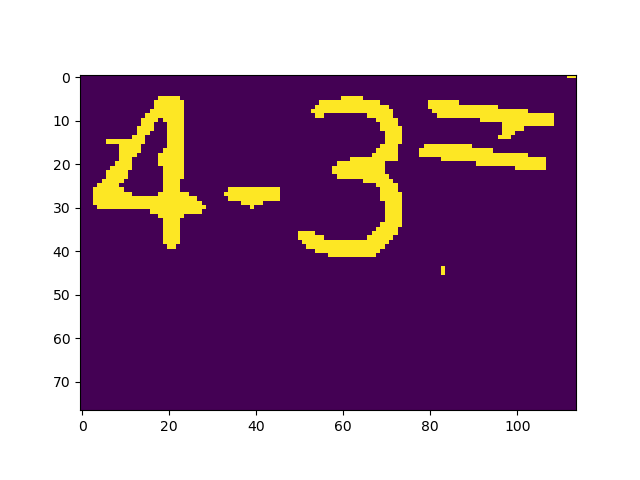
首先对图像进行灰度转换、阈值二值化、中值滤波:
        img = cv.imread("./img/" + str(i).zfill(3) + ".jpg")
        img2gray = cv.cvtColor(img, cv.COLOR_BGR2GRAY)
        ret, mask = cv.threshold(img2gray, 90, 255, cv.THRESH_BINARY_INV)
        blu = cv.medianBlur(mask, 3)
中间可以下断点使用函数plt.imshow()看到图片输出结果,从左到右依次为原图、单通道灰度图、二值化图(阈值为90)、中值滤波后的图:

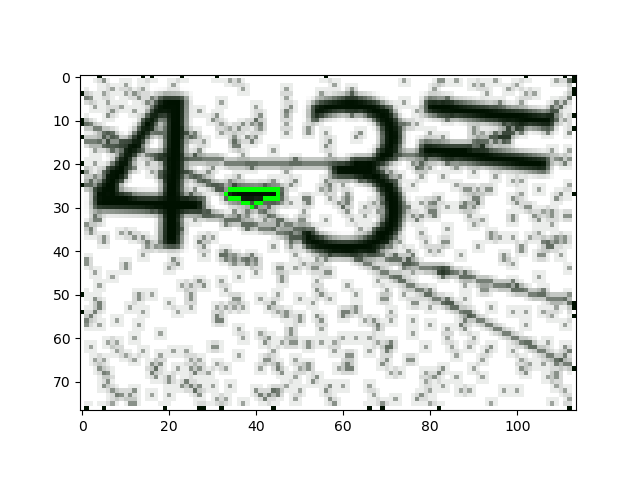
然后通过函数cv.findContours()找到闭区间,并对面积大于10个像素的区间进行分析并用cv.drawContours()画上标注。注意,cv.approxPolyDP()函数可以让区域边缘变得更加平滑,但是这里参数为0所以没有任何作用。
        contours, hierarchy = cv.findContour***lu, cv.RETR_EXTERNAL, cv.CHAIN_APPROX_SIMPLE)
        area = map(cv.contourArea, contours)
        area = list(area)
        for j in range(len(contours)):
            if area[j] > 10:
                cnt = contours[j]
                epsilon = 0 * cv.arcLength(cnt, True)
                approx = cv.approxPolyDP(cnt, epsilon, True)
                aaa = cv.drawContours(img.copy(), [approx], 0, (0, 255, 0), 1)
                plt.imshow(aaa)
                plt.show()
图例如下:
然后获取包含该区域得最小矩形区域并且旋转该矩形区域为正放置的图像便于保存成文件:
rect = cv.minAreaRect(approx)
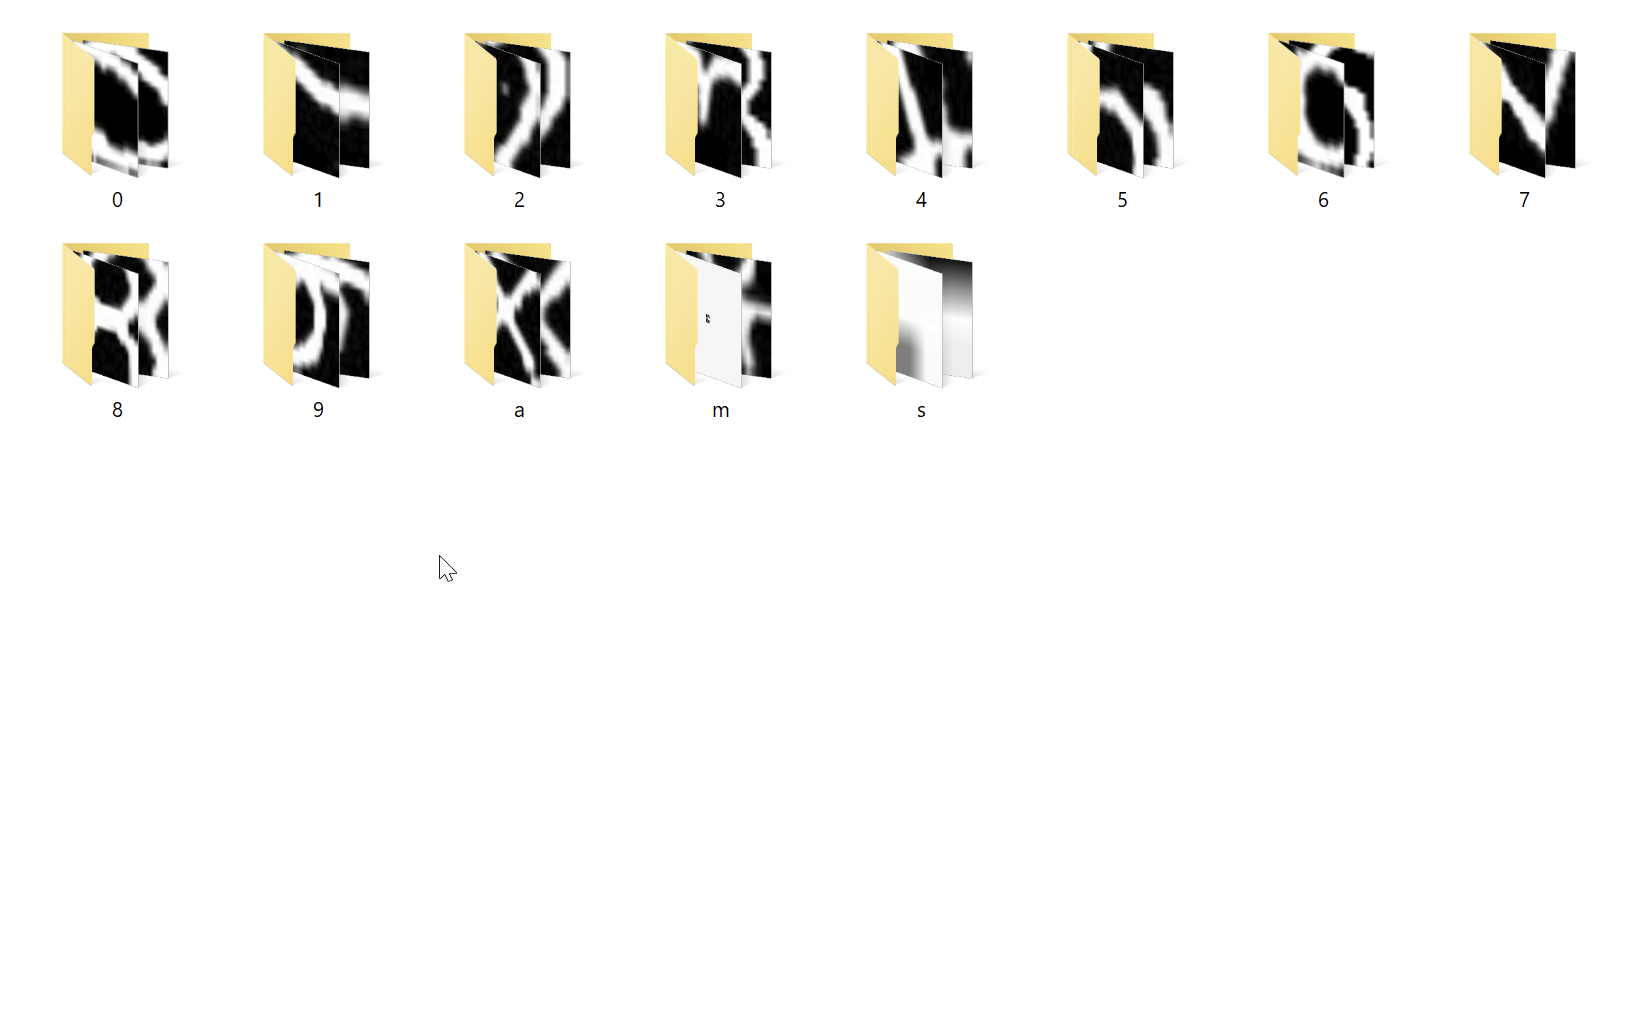
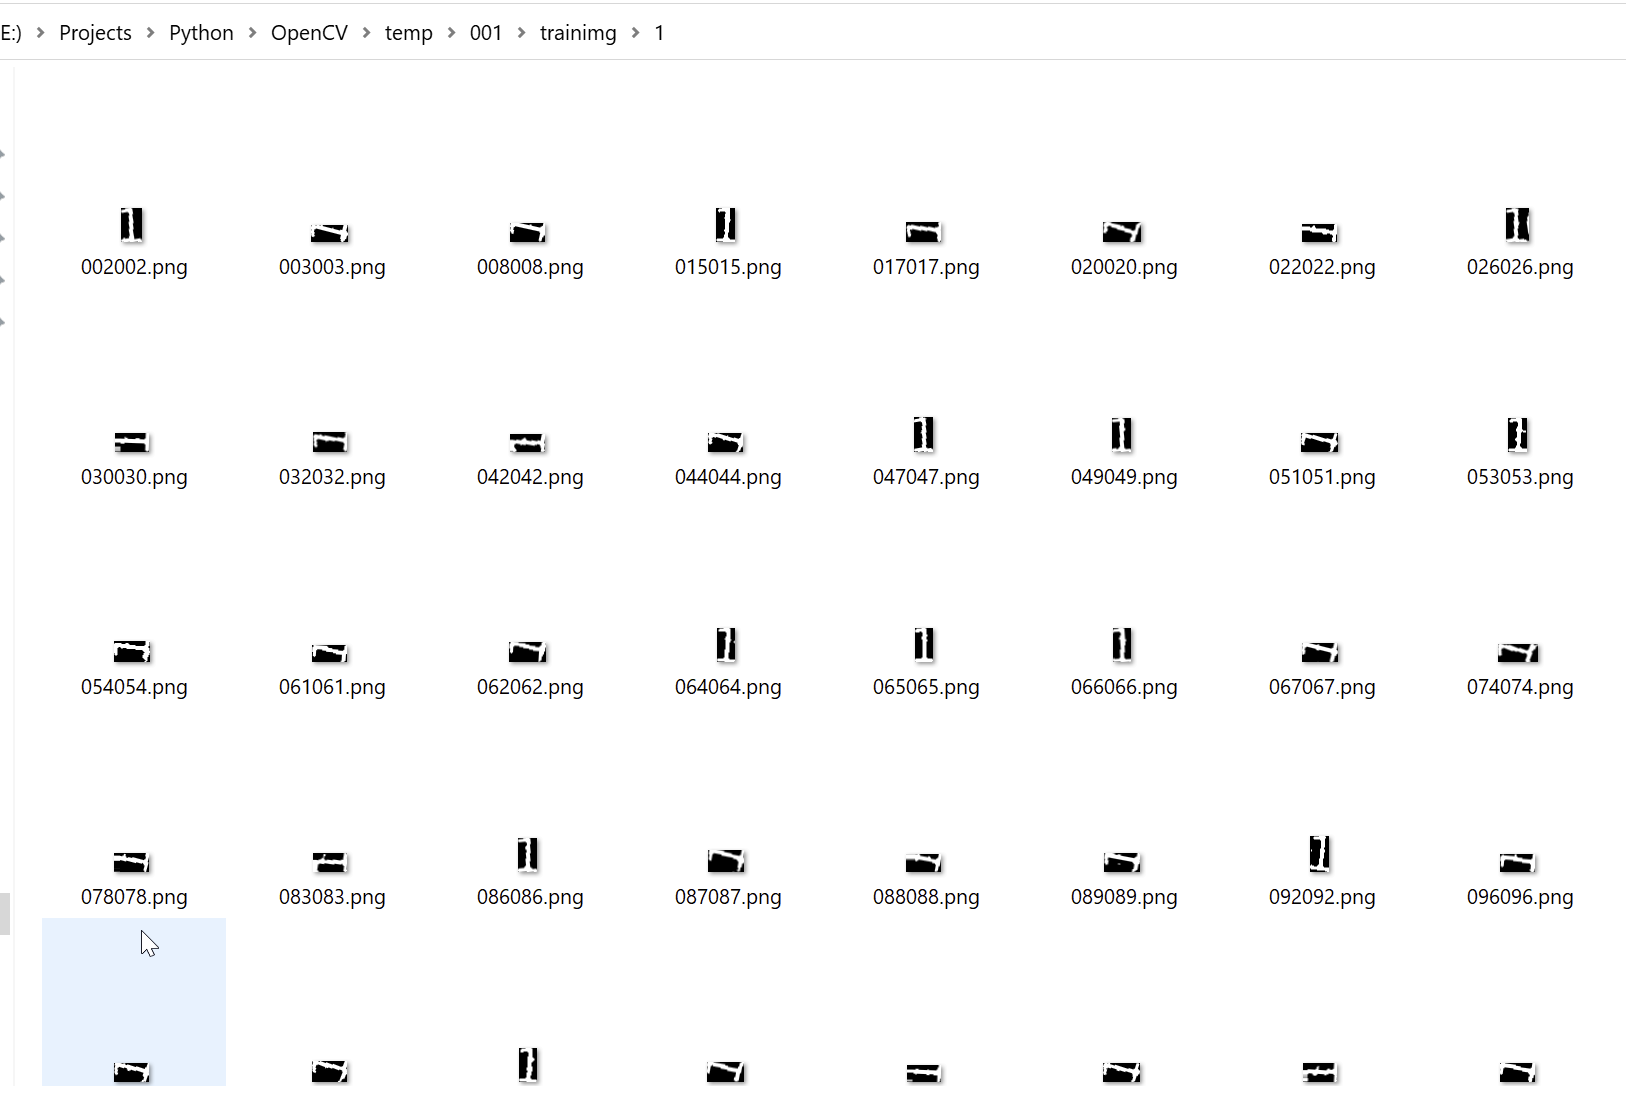
img_crop, img_rot = crop_rect(blu.copy(), rect) 最后对每个图像进行标注保存,从而实现分类功能。每个文件价下都是不同的图案
完整代码如下:
import numpy as np
import cv2 as cv
from matplotlib import pyplot as plt

def savecon(contours, str):
    global contours_all
    contours_all[str] = contours


def crop_rect(img, rect):
    # get the parameter of the **all rectangle
    center, size, angle = rect[0], rect[1], rect[2]
    center, size = tuple(map(int, center)), tuple(map(int, size))

    # get row and col num in img
    height, width = img.shape[0], img.shape[1]

    # print(angle)
    # calculate the rotation matrix
    M = cv.getRotationMatrix2D(center, angle, 1)
    # rotate the original image
    img_rot = cv.warpAffine(img, M, (width, height))

    # now rotated rectangle becomes vertical, and we crop it
    img_crop = cv.getRectSubPix(img_rot, size, center)

    return img_crop, img_rot


# %%
if __name__ == "__main__":
    for i in range(100):
        i += 100
        img = cv.imread("./img/" + str(i).zfill(3) + ".jpg")
        img2gray = cv.cvtColor(img, cv.COLOR_BGR2GRAY)
        ret, mask = cv.threshold(img2gray, 90, 255, cv.THRESH_BINARY_INV)
        blu = cv.medianBlur(mask, 3)
        contours, hierarchy = cv.findContour***lu, cv.RETR_EXTERNAL, cv.CHAIN_APPROX_SIMPLE)
        area = map(cv.contourArea, contours)
        area = list(area)
        for j in range(len(contours)):
            if area[j] > 10:
                cnt = contours[j]
                epsilon = 0 * cv.arcLength(cnt, True)
                approx = cv.approxPolyDP(cnt, epsilon, True)
                rect = cv.minAreaRect(approx)
                img_crop, img_rot = crop_rect(blu.copy(), rect)
                aaa = cv.drawContours(img.copy(), [approx], 0, (0, 255, 0), 1)
                plt.imshow(aaa)
                plt.show()
                while True:
                    key = input("key:")
                    if key == "":
                        break
                    elif key in ["0", "1", "2", "3", "4", "5", "6", "7", "8", "9", "a", "******"]:
                        path = "./trainimg/" + key + "/" + str(i).zfill(3) + str(j).zfill(3) + ".png"
                        cv.imwrite(path, img_crop)
                        break
                    else:
                        print("输入错误")
4、使用tensorflow进行图片识别
由于对性能有要求,所以这里就用很简单的3层卷积+一层全连接。
Model: "sequential"
_________________________________________________________________
 Layer (type)                Output Shape              Param #
=================================================================
 rescaling (Rescaling)       (None, 64, 64, 3)         0

 conv2d (Conv2D)             (None, 64, 64, 16)        448

 max_pooling2d (MaxPooling2D  (None, 32, 32, 16)       0
 )

 conv2d_1 (Conv2D)           (None, 32, 32, 32)        4640

 max_pooling2d_1 (MaxPooling  (None, 16, 16, 32)       0
 2D)

 conv2d_2 (Conv2D)           (None, 16, 16, 64)        18496

 max_pooling2d_2 (MaxPooling  (None, 8, 8, 64)         0
 2D)

 flatten (Flatten)           (None, 4096)              0

 dense (Dense)               (None, 128)               524416

 dense_1 (Dense)             (None, 13)                1677

=================================================================
Total params: 549,677
Trainable params: 549,677
Non-trainable params: 0
_________________________________________________________________
全部代码如下:
import matplotlib.pyplot as plt
import numpy as np
import PIL
import tensorflow as tf
from tensorflow import keras
from tensorflow.keras import layers
from tensorflow.kera***odels import Sequential
#%%
batch_size = 32
img_height = 64
img_width = 64
train_ds = tf.keras.utils.image_dataset_from_directory("./trainimg", validation_split=0.2, subset="training", seed=12, image_size=(img_height, img_width), batch_size=batch_size)
val_ds = tf.keras.utils.image_dataset_from_directory("./trainimg", validation_split=0.2, subset="validation", seed=12, image_size=(img_height, img_width), batch_size=batch_size)
class_names = train_ds.class_names
print(class_names)
#%%
plt.figure(figsize=(10, 10))
for images, labels in train_ds.take(1):
for i in range(9):
ax = plt.subplot(3, 3, i + 1)
plt.imshow(images[i].numpy().astype("uint8"))
plt.title(class_names[labels[i]])
plt.axis("off")
#%%
for image_batch, label***atch in train_ds:
print(image_batch.shape)
print(label***atch.shape)
break
#%%
num_classes = len(class_names)
model = Sequential([
layers.Rescaling(1. / 255, input_shape=(img_height, img_width, 3)),
layers.Conv2D(16, 3, padding='same', activation='relu'),
layers.MaxPooling2D(),
layers.Conv2D(32, 3, padding='same', activation='relu'),
layers.MaxPooling2D(),
layers.Conv2D(64, 3, padding='same', activation='relu'),
layers.MaxPooling2D(),
layers.Flatten(),
layers.Dense(128, activation='relu'),
layers.Dense(num_classes)
])
#%%
model.compile(optimizer='adam', loss=tf.keras.losses.SparseCategoricalCrossentropy(from_logits=True), metrics=['accuracy'])
model.summary()
#%%
epochs = 10
history = model.fit(train_ds, validation_data=val_ds, epochs=epochs)
#%%
model.save('my_model.h5')
#%%
# Recreate the exact same model, including its weights and the optimizer
new_model = tf.kera***odels.load_model('my_model.h5')
# Show the model architecture
new_model.summary()
loss, acc = new_model.evaluate(val_ds, verbose=2)
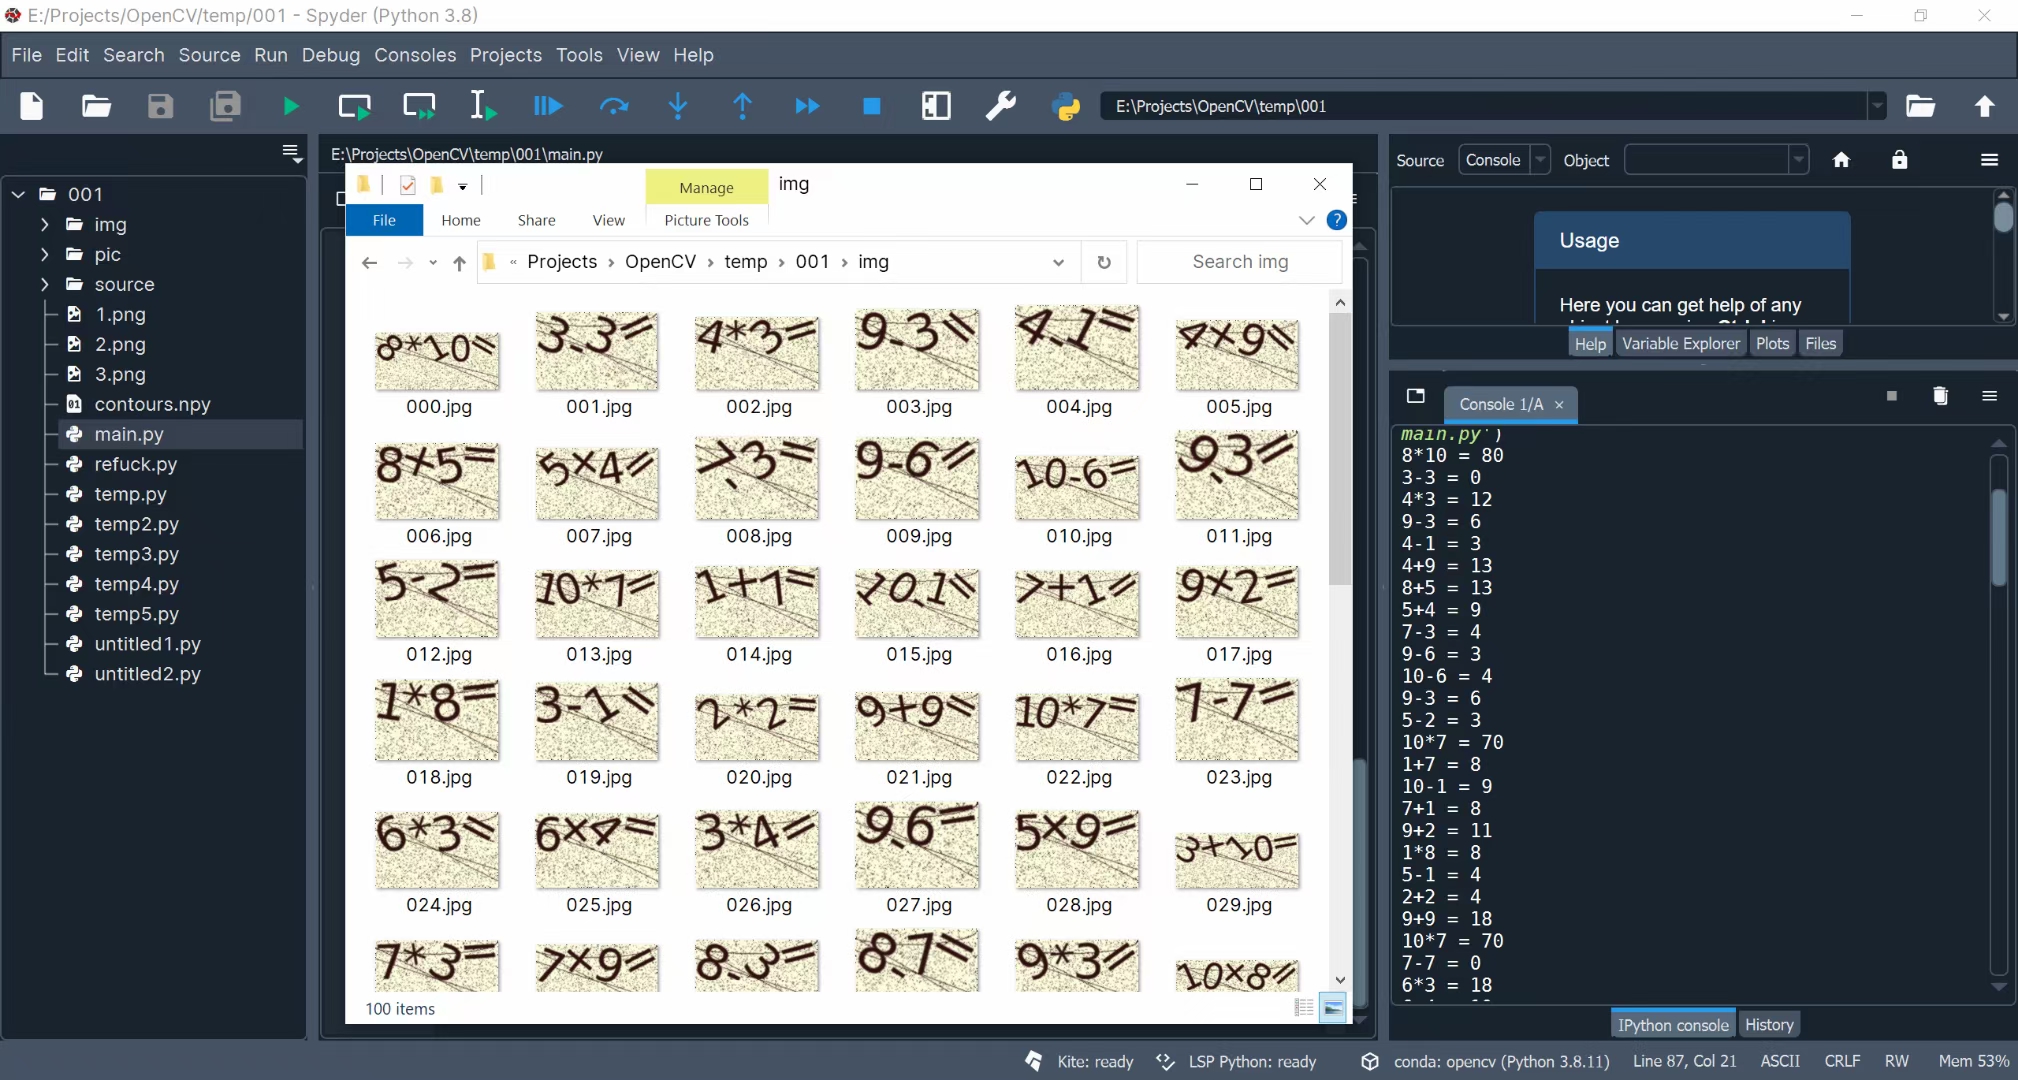
print('Restored model, accuracy: {:5.2f}%'.format(100 * acc))
最终可以看到,识别正确率在100%,可能时图片相对较为简单,比较容易识别。
5、验证码表达式识别
这里比较简单,就不给源代码了。实在不行去我公众号里面要。
就是注意一下上一步contours值中包含了这个区域的位置信息,根据位置信息将各个识别出来的图片进行排序得到表达式。最后使用eval()函数就可以直接得到表达式的值。
如下图,正确率在95%以上:
学习了 谢谢分享
收起