【爱克斯开发板试用】爱克斯开发板使用OpenVINO C# API
 椒颜皮皮虾
更新于 2年前
椒颜皮皮虾
更新于 2年前
英特尔发行版 OpenVINO™工具套件基于oneAPI 而开发,可以加快高性能计算机视觉和深度学习视觉应用开发速度工具套件,适用于从边缘到云的各种英特尔平台上,帮助用户更快地将更准确的真实世界结果部署到生产系统中。通过简化的开发工作流程, OpenVINO™可赋能开发者在现实世界中部署高性能应用程序和算法。
C#是由C和C++衍生出来的一种安全的、稳定的、简单的、优雅的面向对象编程语言。C#综合了VB简单的可视化操作和C++的高运行效率,以其强大的操作能力、优雅的语法风格、创新的语言特性和便捷的面向组件编程的支持成为.NET开发的首选语言。然而 OpenVINO™未提供C#语言接口,这对在C#中使用 OpenVINO™带来了很多麻烦,在之前的工作中,我们推出了OpenVINO C# API,旨在推动 OpenVINO™在C#领域的应用,目前已经成功在Window平台实现使用。在本文中,我们将介绍如何在 AIxBoard开发板上基于Linux系统实现OpenVINO C# API。
一、英特尔开发套件 AIxBoard 介绍

1. 产品定位
英特尔开发套件 AIxBoard(爱克斯板)是英特尔开发套件官方序列中的一员,专为入门级人工智能应用和边缘智能设备而设计。爱克斯板能完美胜人工智能学习、开发、实训、应用等不同应用场景。该套件预装了英特尔OpenVINO™工具套件、模型仓库和演示案例,便于您轻松快捷地开始应用开发。
套件主要接口与Jetson Nano载板兼容,GPIO与树莓派兼容,能够最大限度地复用成熟的生态资源。这使得套件能够作为边缘计算引擎,为人工智能产品验证和开发提供强大支持;同时,也可以作为域控核心,为机器人产品开发提供技术支撑。
使用AIxBoard(爱克斯板)开发套件,您将能够在短时间内构建出一个出色的人工智能应用应用程序。无论是用于科研、教育还是商业领域,爱克斯板都能为您提供良好的支持。借助 OpenVINO™ 工具套件,CPU、iGPU 都具备强劲的 AI 推理能力,支持在图像分类、目标检测、分割和语音处理等应用中并行运行多个神经网络。
2. 产品参数
| 主控 | 英特尔赛扬N5105 2.0-2.9GHz (formerly Jasper Lake) |
|---|---|
| 内存 | 板载LPDDR4x 2933MHz, 4GB/6GB/8GB |
| 存储 | 板载 64GB eMMC存储 |
| 存储扩展 | 1个M.2 Key-M 2242扩展槽, 支持SATA&NVME协议 |
| BIOS | AMI UEFI BIOS |
| 系统支持 | Ubuntu20.04 LTS |
| Winodws 10/11 |
3. AI推理单元
借助OpenVINO工具,能够实现CPU+iGPU异构计算推理,IGPU算力约为0.6TOPS
| CPU | INT8/FP16/FP32 |
|---|---|
| iGPU | INT8/FP16 0.6TOPS |
| GNA | 高斯及神经加速器 |
二、配置 .NET 环境
.NET 是一个免费的跨平台开源开发人员平台 ,用于构建多种应用程序。下面将演示 AIxBoard 如何在 Ubuntu 20.04 上安装 .NET,支持 .NET 6 ,如果你的 AIxBoard 使用的是其他Linux系统,你可以参考在 Linux 发行版上安装 .NET - .NET | Microsoft Learn。
1. 添加 Microsoft 包存储库
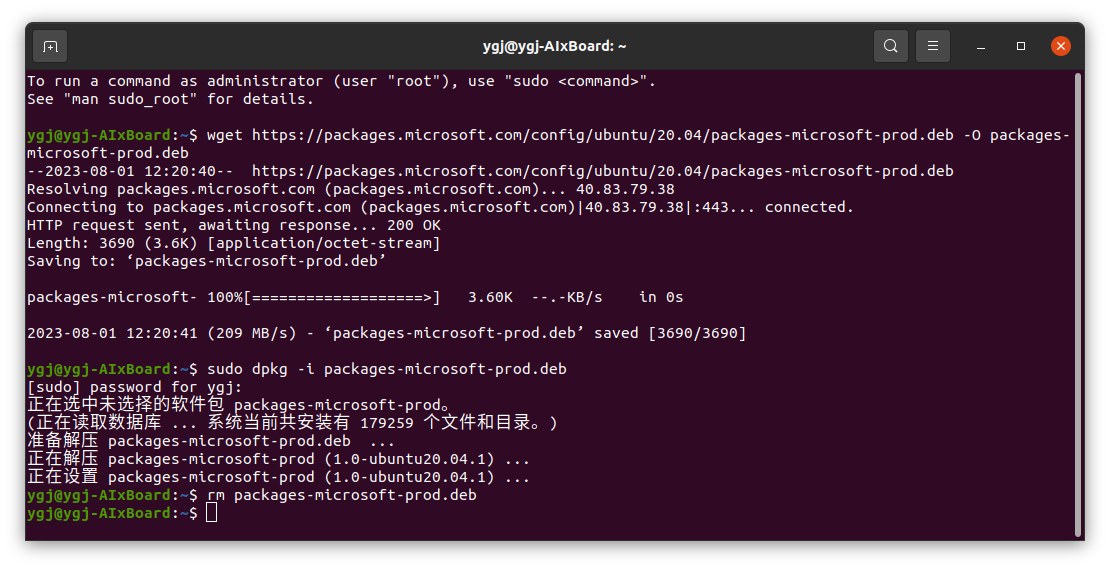
使用 APT 进行安装可通过几个命令来完成。 安装 .NET 之前,请运行以下命令,将 Microsoft 包签名密钥添加到受信任密钥列表,并添加包存储库。
打开终端并运行以下命令:
wget https://package***icrosoft.com/config/ubuntu/20.04/package***icrosoft-prod.deb -O package***icrosoft-prod.deb
sudo dpkg -i package***icrosoft-prod.deb
rm package***icrosoft-prod.deb
下图为输入上面命令后控制台的输出:
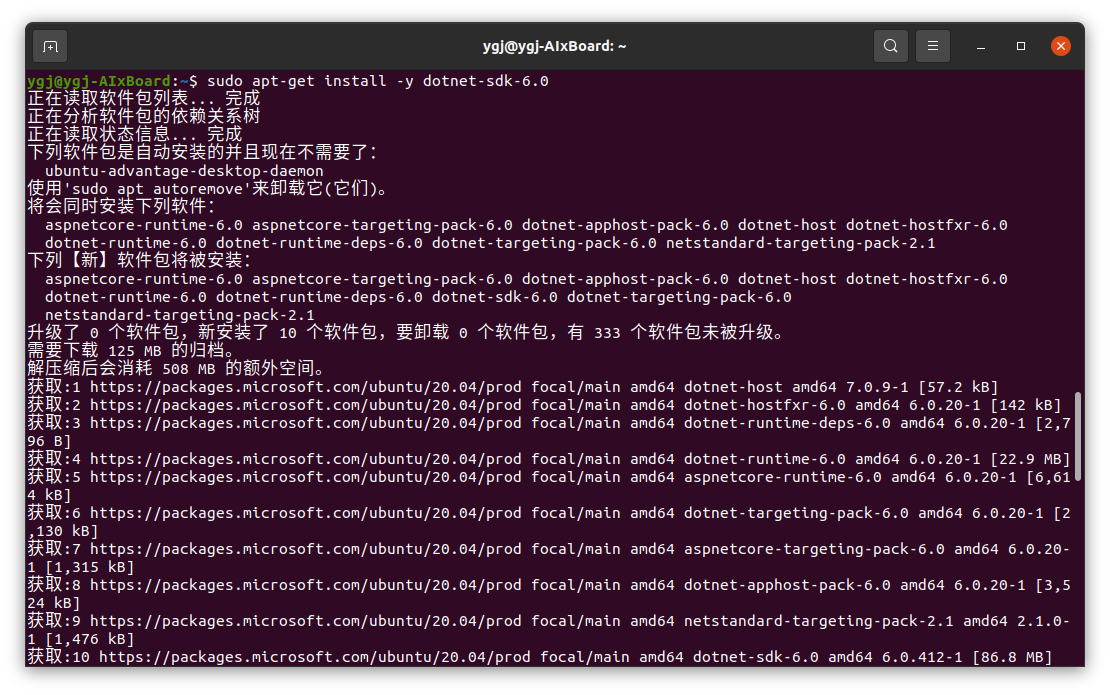
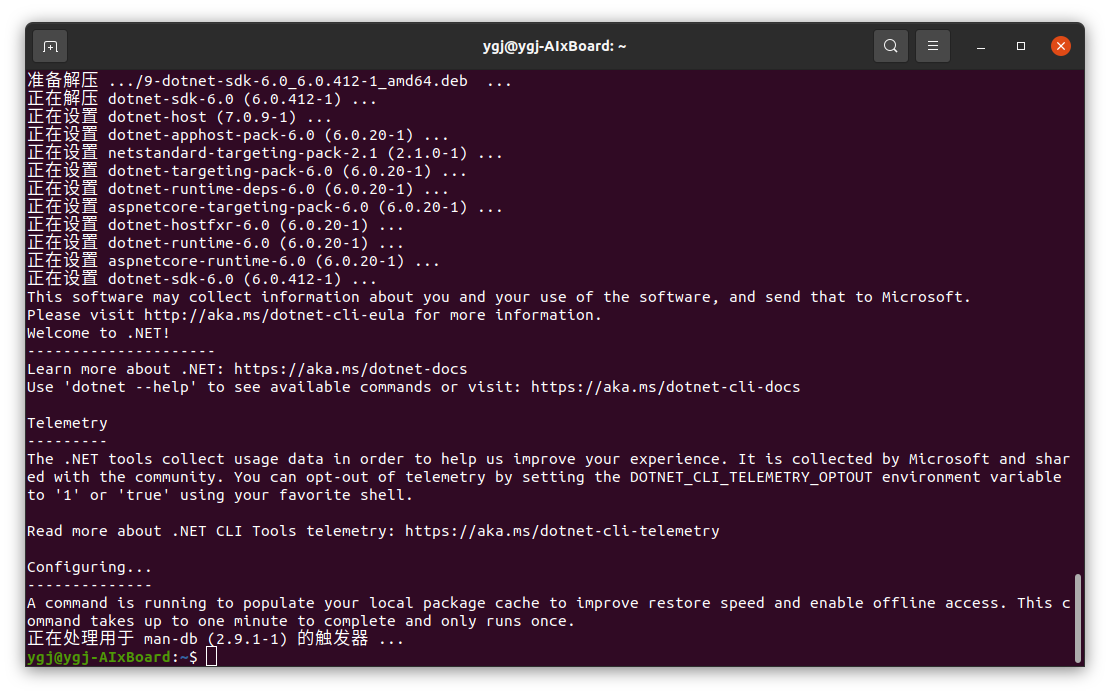
2. 安装 SDK
.NET SDK 使你可以通过 .NET 开发应用。 如果安装 .NET SDK,则无需安装相应的运行时。 若要安装 .NET SDK,请运行以下命令:
sudo apt-get update
sudo apt-get install -y dotnet-sdk-6.0
下图为安装后控制台的输出:
 |  |
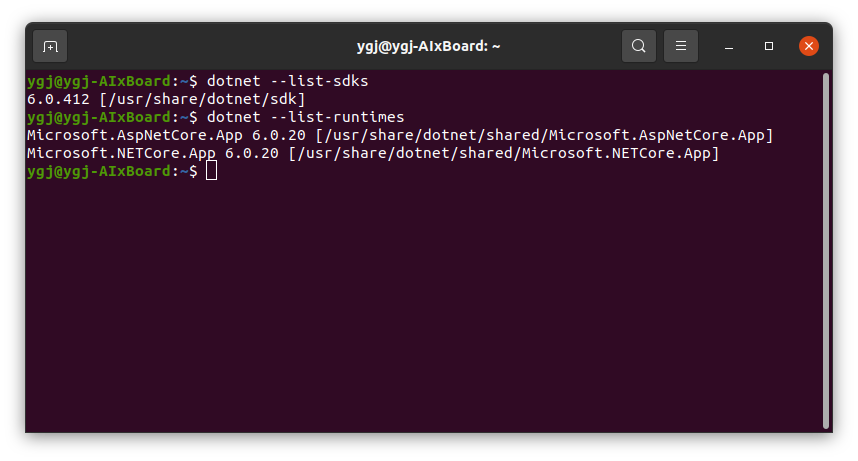
3. 测试安装
通过命令行可以检查 SDK 版本以及Runtime时版本。
dotnet --list-sdk***r/>dotnet --list-runtimes
下图为输入测试命令后控制台的输出:
4. 测试控制台项目
在linux环境下,我们可以通过dotnet命令来创建和编译项目,项目创建命令为:
dotnet new <project_type> -o <project name>
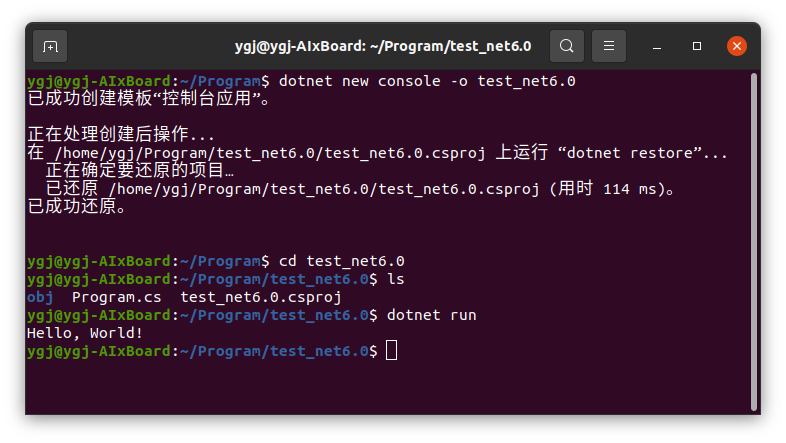
此处我们创建一个简单测试控制台项目:
dotnet new console -o test_net6.0
cd test_net6.0
dotnet run
下图为输入测试命令后控制台的输出以及项目文件夹文件情况,C#项目会自动创建一个Program.cs程序文件,里面包含了程序运行入口主函数,同时还会创建一个*.csproj文件,负责指定项目编译中的一些配置。

以上就是.NET环境的配置步骤,如果你的环境与本文不匹配,可以通过.NET 文档 | Microsoft Learn 获取更多安装步骤。
三、安装 OpenVINO Runtime
OpenVINO™ 有两种安装方式: OpenVINO Runtime和OpenVINO Development Tools。OpenVINO Runtime包含用于在处理器设备上运行模型部署推理的核心库。OpenVINO Development Tools是一组用于处理OpenVINO和OpenVINO模型的工具,包括模型优化器、OpenVINO Runtime、模型下载器等。在此处我们只需要安装OpenVINO Runtime即可。
1. 下载 OpenVINO Runtime
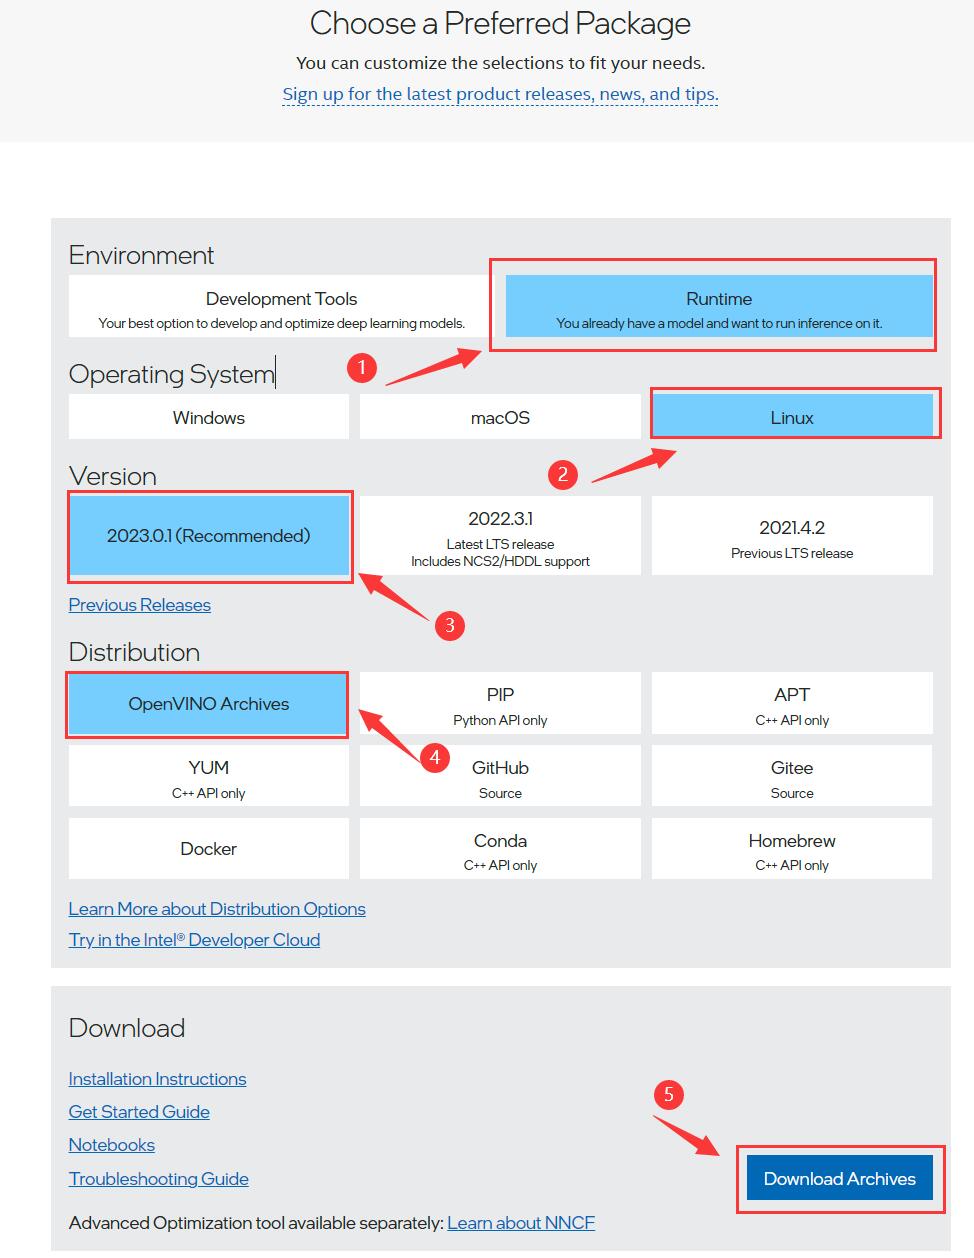
访问Download the Intel Distribution of OpenVINO Toolkit页面,按照下面流程选择相应的安装选项,在下载页面,由于我们的设备使用的是Ubuntu20.04,因此下载时按照指定的编译版本下载即可。

2. 解压安装包
我们所下载的 OpenVINO Runtime 本质是一个C++依赖包,因此我们把它放到我们的系统目录下,这样在编译时会根据设置的系统变量获取依赖项。首先在系统文件夹下创建一个文件夹:
sudo mkdir -p /opt/intel
然后解压缩我们下载的安装文件,并将其移动到指定文件夹下:
tar -xvzf l_openvino_toolkit_ubuntu20_2023.0.1.11005.fa1c41994f3_x86_64.tgz
sudo mv l_openvino_toolkit_ubuntu20_2023.0.1.11005.fa1c41994f3_x86_64 /opt/intel/openvino_2022.3.0
3. 安装依赖
接下来我们需要安装 OpenVINO Runtime 所许雅的依赖项,通过命令行输入以下命令即可:
cd /opt/intel/openvino_2022.3.0/
sudo -E ./install_dependencies/install_openvino_dependencies.sh

4. 配置环境变量
安装完成后,我们需要配置环境变量,以保证在调用时系统可以获取对应的文件,通过命令行输入以下命令即可:
source /opt/intel/openvino_2022.3.0/setupvars.sh
以上就是 OpenVINO Runtime 环境的配置步骤,如果你的环境与本文不匹配,可以通过Install OpenVINO™ Runtime — OpenVINO™ documentation — Version(2023.0)获取更多安装步骤。
四、OpenVINO C# API 在 AIxBoard 实现
在前面的步骤里,我们已经实现安装了.NET、OpenVINO Runtime 环境,记下来我们纠结和上面两个工具在 AIxBoard 实现OpenVINO C# API 。
1. 新建和配置测试项目
首先我们通过dotnet创建一个C#控制台项目:
dotnet new console -o test_openvinosharp
test_openvinosharp
通过文本编译器编辑Program.cs文件,首先在该文件中添加一下代码,构建程序结构:
using System;
using System.Runtime.InteropService****r/>namespace test_openvinosharp
{
    internal class Program{
        static void Main(string[] arg****r/>        {
        }
    }
}
2. 添加OpenVINO接口
在该项目中,实现思路为通过动态链接库文件,调用OpenVINO中C API接口,因此我们首先将我们所使用到的API接口实现,由于本次为测试项目,所以我们只读取相关的一些接口,实现原则如下:
[DllImport(string dll_path, EntryPoint = string func_name, CharSet = CharSet.Unicode, CallingConvention = CallingConvention.Cdecl)]
public extern static void func(Val val);
通过动态链接口实现 C API 接口读入需要满足以下三点:函数名对应、函数参数对应以及函数返回值对应,其中由于编程语言不一致,导致数据类型会有相应的差异,所以需要保证数据之间的格式对应。
下面我们读取里几个接口,主要用于测试OpenVINO是否导入成功。
class NativeMethod****r/>    const string dll_extern = "libopenvino_c.so";
    [DllImport(dll_extern, EntryPoint = "ov_get_openvino_version", CharSet = CharSet.Unicode, CallingConvention = CallingConvention.Cdecl)]
    public extern static int ov_get_openvino_version(IntPtr version);
    [DllImport(dll_extern, EntryPoint = "ov_version_free", CharSet = CharSet.Unicode, CallingConvention = CallingConvention.Cdecl)]
    public extern static int ov_version_free(IntPtr version);
    [DllImport(dll_extern, EntryPoint = "ov_core_create", CharSet = CharSet.Unicode, CallingConvention = CallingConvention.Cdecl)]
    public extern static int ov_core_create(ref IntPtr core);
    [DllImport(dll_extern, EntryPoint = "ov_core_free", CharSet = CharSet.Unicode, CallingConvention = CallingConvention.Cdecl)]
    public extern static int ov_core_free(IntPtr core);
    [DllImport(dll_extern, EntryPoint = "ov_core_get_version***y_device_name", CharSet = CharSet.Unicode, CallingConvention = CallingConvention.Cdecl)]
    public extern static int ov_core_get_version***y_device_name(IntPtr core, ref **yte device_name, IntPtr version*****r/>    [DllImport(dll_extern, EntryPoint = "ov_core_versions_free", CharSet = CharSet.Unicode, CallingConvention = CallingConvention.Cdecl)]
    public extern static int ov_core_versions_free(IntPtr version*****r/>}
3. 添加 Core Version
下面定义了一个Version结构体,主要用于实现获取Core Version ,读取 OpenVINO 版本,主要调用了ov_get_openvino_version 接口实现,具体实现流程此处不做过多赘述。
public struct Version
{
    public string buildNumber;
    public string description;
    public Version(string buildNumber, string description) {
        thi***uildNumber = buildNumber;
        this.description = description;
    }
    public string to_string()
    {
        string str = "";
        str += description;
        str += "\r\n    Version : ";
        str += buildNumber.Substring(0, buildNumber.IndexOf("-"));
        str += "\r\n    Build   : ";
        str += buildNumber;
        return str;
    }
    public static Version get_openvino_version()
    {
        int l = Marshal.SizeOf(typeof(Version));
        IntPtr ptr = Marshal.AllocHGlobal(l);
        int status = NativeMethods.ov_get_openvino_version(ptr);
        if (status != 0)
        {
            System.Diagnostics.Debug.WriteLine("ov get_openvino_version() error!");
            return new Version();
        }
        var temp = Marshal.PtrToStructure(ptr, typeof(Version));
        Version version = (Version)temp;
        string build = String.Copy(version.buildNumber);
        string description = String.Copy(version.description);
        Version new_version = new Version(build, description);
        NativeMethods.ov_version_free(ptr);
        return new_version;
    }
}
该结构体可以实现OpenVINO 版本的获取,在使用时直接通过调用对应的方法即可:
Version v = Version.get_openvino_version();
Console.WriteLine(v.to_string());
4. 添加 Core
第三步中我们已经通过Version获取了OpenVINO Runtime的版本,下面我们通过Core,获取指定设备信息版本,主要调用了``ov_core_get_version***y_device_name`` 接口实现,具体实现流程此处不做过多赘述。
public struct CoreVersion
{
    public string device_name;
    public Version version;
}
public struct CoreVersionList
{
    public IntPtr core_version;
    public ulong size;
}
public class Core
{
    private IntPtr ptr = IntPtr.Zero;
    public IntPtr Ptr { get { return ptr; } set { ptr = value; } }
    public Core(string xml_config_file = null)
    {
        int status;
        status = NativeMethods.ov_core_create(ref ptr);
        if (status != 0) {
            ptr = IntPtr.Zero;
        }

    }
    ~Core() { dispose(); }
    public void dispose()
    {
        if (ptr == IntPtr.Zero)
        {
            return;
        }
        NativeMethods.ov_core_free(ptr);

        ptr = IntPtr.Zero;
    }
    public KeyValuePair<string, Version> get_versions(string device_name)
    {
        int status;
        int l = Marshal.SizeOf(typeof(CoreVersionList));
        IntPtr ptr_core_version_s = Marshal.AllocHGlobal(l);
        **yte[] c_device_name = (**yte[])((Array)System.Text.Encoding.Default.GetBytes(device_name));
        status = NativeMethods.ov_core_get_version***y_device_name(ptr, ref c_device_name[0], ptr_core_version_s);
        if (status != 0)
        {
            System.Diagnostics.Debug.WriteLine("Core get_versions() error : " + status.ToString());
            return new KeyValuePair<string, Version>();
        }
        var temp1 = Marshal.PtrToStructure(ptr_core_version_s, typeof(CoreVersionList));

        CoreVersionList core_version_s = (CoreVersionList)temp1;
        var temp2 = Marshal.PtrToStructure(core_version_s.core_version, typeof(CoreVersion));
        CoreVersion core_version = (CoreVersion)temp2;
        KeyValuePair<string, Version> value = new KeyValuePair<string, Version>(core_version.device_name, core_version.version);
        status = NativeMethods.ov_core_versions_free(ptr_core_version_s);
        if (status != 0)
        {
            System.Diagnostics.Debug.WriteLine("Core get_versions() error : " + status.ToString());
            return new KeyValuePair<string, Version>();
        }
        return value;
    }
}
该结构体可以通过指定设备名称获取OpenVINO 的版本信息,在使用时直接通过调用对应的方法即可:
Core core = new Core();
KeyValuePair<string, Version> vs = core.get_versions("CPU");
Console.WriteLine(vs.Key);
Console.WriteLine(vs.Value.to_string());
vs = core.get_versions("GPU.0");
Console.WriteLine(vs.Key);
Console.WriteLine(vs.Value.to_string());
core.dispose();
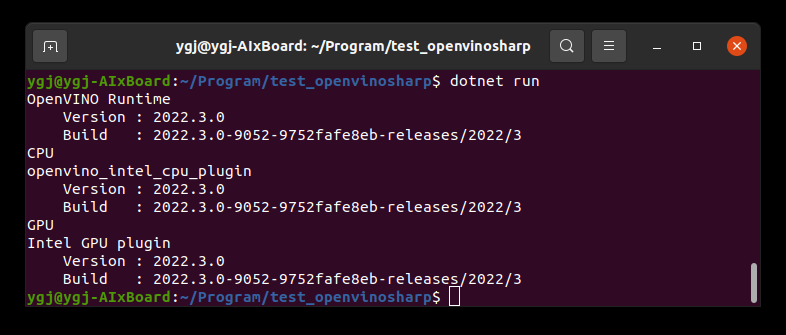
下图中展示了我们上面定义的两种方法获取OpenVINO 的版本信息:
最后,列出该项目中的所有代码,方便大家编译实现,由于该项目仅为测试项目,因此没有划分文件,该项目中所有代码都存放在Program.cs文件中,
using System;
using System.Runtime.InteropServices;
namespace test_openvinosharp
{
    internal class Program{
        static void Main(string[] args)
        {

            Version v = Version.get_openvino_version();
            Console.WriteLine(v.to_string());

            Core core = new Core();
            KeyValuePair<string, Version> vs = core.get_versions("CPU");
            Console.WriteLine(vs.Key);
            Console.WriteLine(vs.Value.to_string());
            vs = core.get_versions("GPU.0");
            Console.WriteLine(vs.Key);
            Console.WriteLine(vs.Value.to_string());
            core.dispose();
        }
    }
    class NativeMethods{

        const string dll_extern = "libopenvino_c.so";

        [DllImport(dll_extern, EntryPoint = "ov_get_openvino_version", CharSet = CharSet.Unicode, CallingConvention = CallingConvention.Cdecl)]
        public extern static int ov_get_openvino_version(IntPtr version);

        [DllImport(dll_extern, EntryPoint = "ov_version_free", CharSet = CharSet.Unicode, CallingConvention = CallingConvention.Cdecl)]
        public extern static int ov_version_free(IntPtr version);
        [DllImport(dll_extern, EntryPoint = "ov_core_create", CharSet = CharSet.Unicode, CallingConvention = CallingConvention.Cdecl)]
        public extern static int ov_core_create(ref IntPtr core);

        [DllImport(dll_extern, EntryPoint = "ov_core_free", CharSet = CharSet.Unicode, CallingConvention = CallingConvention.Cdecl)]
        public extern static int ov_core_free(IntPtr core);

        [DllImport(dll_extern, EntryPoint = "ov_core_get_version***y_device_name", CharSet = CharSet.Unicode, CallingConvention = CallingConvention.Cdecl)]
        public extern static int ov_core_get_version***y_device_name(IntPtr core, ref **yte device_name, IntPtr versions);
        [DllImport(dll_extern, EntryPoint = "ov_core_versions_free", CharSet = CharSet.Unicode, CallingConvention = CallingConvention.Cdecl)]
        public extern static int ov_core_versions_free(IntPtr versions);
    }

    public struct Version
    {
        public string buildNumber;
        public string description;
        public Version(string buildNumber, string description) {
            thi***uildNumber = buildNumber;
            this.description = description;
        }
        public string to_string()
        {
            string str = "";
            str += description;
            str += "\r\n    Version : ";
            str += buildNumber.Substring(0, buildNumber.IndexOf("-"));
            str += "\r\n    Build   : ";
            str += buildNumber;
            return str;
        }
        public static Version get_openvino_version()
        {
            int l = Marshal.SizeOf(typeof(Version));
            IntPtr ptr = Marshal.AllocHGlobal(l);
            int status = NativeMethods.ov_get_openvino_version(ptr);
            if (status != 0)
            {
                System.Diagnostics.Debug.WriteLine("ov get_openvino_version() error!");
                return new Version();
            }
            var temp = Marshal.PtrToStructure(ptr, typeof(Version));
            Version version = (Version)temp;
            string build = String.Copy(version.buildNumber);
            string description = String.Copy(version.description);
            Version new_version = new Version(build, description);
            NativeMethods.ov_version_free(ptr);
            return new_version;
        }
    }
    public struct CoreVersion
    {
        public string device_name;
        public Version version;
    }
    public struct CoreVersionList
    {
        public IntPtr core_version;
        public ulong size;
    }
    public class Core
    {
        private IntPtr ptr = IntPtr.Zero;
        public IntPtr Ptr { get { return ptr; } set { ptr = value; } }
        public Core(string xml_config_file = null)
        {
            int status;
            status = NativeMethods.ov_core_create(ref ptr);
            if (status != 0) {
                ptr = IntPtr.Zero;
            }

        }
        ~Core() { dispose(); }
        public void dispose()
        {
            if (ptr == IntPtr.Zero)
            {
                return;
            }
            NativeMethods.ov_core_free(ptr);

            ptr = IntPtr.Zero;
        }
        public KeyValuePair<string, Version> get_versions(string device_name)
        {
            int status;
            int l = Marshal.SizeOf(typeof(CoreVersionList));
            IntPtr ptr_core_version_s = Marshal.AllocHGlobal(l);
            **yte[] c_device_name = (**yte[])((Array)System.Text.Encoding.Default.GetBytes(device_name));
            status = NativeMethods.ov_core_get_version***y_device_name(ptr, ref c_device_name[0], ptr_core_version_s);
            if (status != 0)
            {
                System.Diagnostics.Debug.WriteLine("Core get_versions() error : " + status.ToString());
                return new KeyValuePair<string, Version>();
            }
            var temp1 = Marshal.PtrToStructure(ptr_core_version_s, typeof(CoreVersionList));

            CoreVersionList core_version_s = (CoreVersionList)temp1;
            var temp2 = Marshal.PtrToStructure(core_version_s.core_version, typeof(CoreVersion));
            CoreVersion core_version = (CoreVersion)temp2;
            KeyValuePair<string, Version> value = new KeyValuePair<string, Version>(core_version.device_name, core_version.version);
            status = NativeMethods.ov_core_versions_free(ptr_core_version_s);
            if (status != 0)
            {
                System.Diagnostics.Debug.WriteLine("Core get_versions() error : " + status.ToString());
                return new KeyValuePair<string, Version>();
            }
            return value;
        }
    }
}
五、总结
以上就是爱克斯开发板使用OpenVINO C# API的全部流程,在该项目中,我们只是对爱克斯开发板使用OpenVinoSharp进行了可行性测试,还没有使用模型进行实验。后续我将会继续开展测试,验证爱克斯开发板的性能,敬请关注。
该项目已经在Window实现,并制作了NuGet包,通过一键式安装即可使用,如有兴趣,欢迎大家访问我的GitHubOpenVinoSharp获取项目源码,如果对该工作有兴趣,也欢迎大家加入到项目开发中。