OpenVINO +YOLOX最新版本推理演示
 openlab_25991cf5
更新于 4年前
openlab_25991cf5
更新于 4年前
本文转载自OpenCV学堂
YOLOX模型ONNX格式说明
我记得大概是在去年七月份的时候我写过一篇文章是介绍YOLOX+OpenVINO推理的,下载YOLOX的ONNX格式模型(github上可以下载)
https://github.com/Megvii-BaseDetection/YOLOX/tree/main/demo/ONNXRuntime
https://github.com/Megvii-BaseDetection/YOLOX/releases/download/0.1.1rc0/yolox_s.onnx
下载ONNX格式模型,打开之后如图:
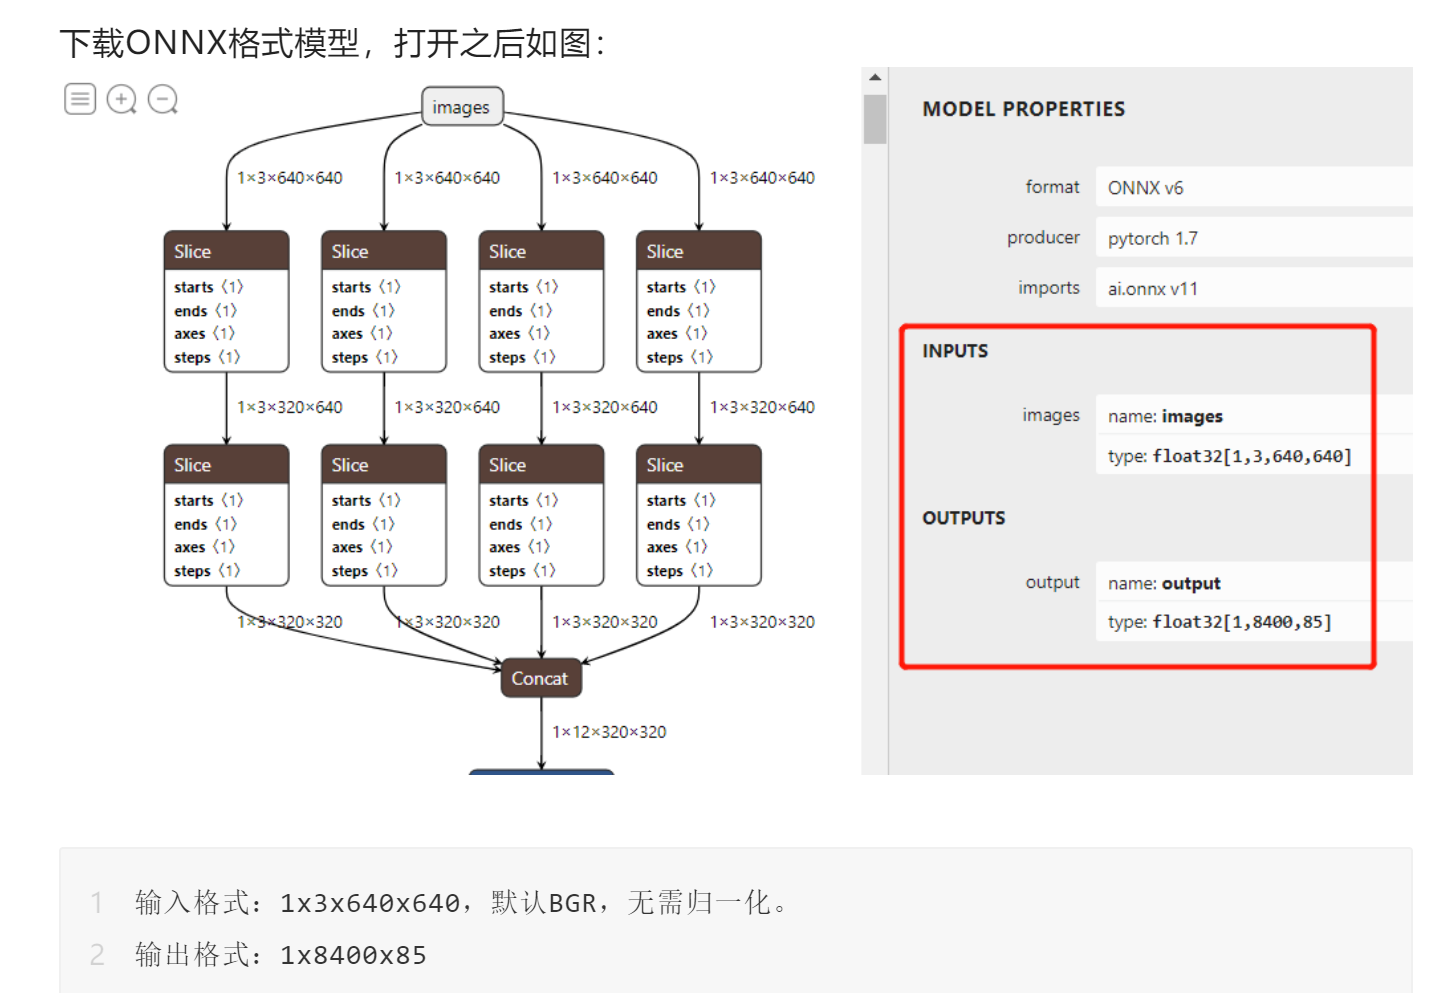
01 什么是85
其中85的前四个是cx、cy、w、h大小,第五个是object预测得分,后面80个是COCO类别。
02 什么是8400
模型在数据输入端几乎与YOLOv5的代码一致,没有什么特别之处,唯一不同的在于输出层的解析,是把三个不同的输出层合并在一个里面了,分别是80x80, 40x40, 20x20, 每个特征点预测,所以总数才会是80x80+40x40+20x20 =8400
03 输出层解析解密
最后一层输出,这点跟YOLOv5最新版本输出层有点相似,但是YOLOv5的输出层更近一步,已经计算了相关的矩形框位置信息,直接输出就是绝对位置信息,而YOLOX还是输出原始的相对位置信息,需要解析一波才行(跟最新的YOLOv5相同),说明YOLOX的工程化方面还有待提升!不是开源就完事了!
OpenVINO推理解析
必须说明一点,参考了官方的部分代码,然后在上面猛改一通(原因是官方代码写的不是很好),改完之后,封装成一个类了,主要的方法跟我封装的YOLOv5的推理类相似,导出了两个函数方法
void YOLOXDetector::initConfig(std::string onnxpath, float nms, float score)<br/>
该方法表示初始化IE,然后加载模型,设置nms阈值与置信度阈值score,创建一个推理请求,同时初始化每一层上对应每个特征点尺度比率。这部分的代码如下:
void YOLOXDetector::initConfig(std::string onnxpath, float nms, float score) {
    this->nms_threshold = nms;
    this->score_threshold = score;
    Core ie;
    CNNNetwork network = ie.ReadNetwork(onnxpath);
    InputInfo::Ptr input_info = network.getInputsInfo().begin()->second;
    this->input_name = network.getInputsInfo().begin()->first;

    DataPtr output_info = network.getOutputsInfo().begin()->second;
    this->out_name = network.getOutputsInfo().begin()->first;
    output_info->setPrecision(Precision::FP32);

    ExecutableNetwork executable_network = ie.LoadNetwork(network, "CPU");
    this->infer_request = executable_network.CreateInferRequest();

    std::vector<int> strides = { 8, 16, 32 };
    generate_grids_and_stride(INPUT_W, INPUT_H, strides, grid_strides);
}
检测函数
void detect(cv::Mat & frame, std::vector&results); 该方法完成检测,并把检测结果作为resulte返回,相关的代码实现可以参考之前的文章,感觉并没有什么不同,其中最大的不同的地方是对输出结果的解析,这边代码作为单独的方法函数实现如下(参考官方):
void YOLOXDetector::generate_yolox_proposals(std::vector<GridAndStride> grid_strides, const float* feat_ptr, float prob_threshold, std::vector<DetectResult>& objects)
{
    const int num_anchors = grid_strides.size();
    for (int anchor_idx = 0; anchor_idx < num_anchors; anchor_idx++)
    {
        const int grid0 = grid_strides[anchor_idx].grid0;
        const int grid1 = grid_strides[anchor_idx].grid1;
        const int stride = grid_strides[anchor_idx].stride;

        const int basic_pos = anchor_idx * (NUM_CLASSES + 5);

        // yolox/models/yolo_head.py decode logic
        float x_center = (feat_ptr[basic_pos + 0] + grid0) * stride;
        float y_center = (feat_ptr[basic_pos + 1] + grid1) * stride;
        float w = exp(feat_ptr[basic_pos + 2]) * stride;
        float h = exp(feat_ptr[basic_pos + 3]) * stride;
        float x0 = x_center - w * 0.5f;
        float y0 = y_center - h * 0.5f;

        float box_objectness = feat_ptr[basic_pos + 4];
        for (int class_idx = 0; class_idx < NUM_CLASSES; class_idx++)
        {
            float box_cls_score = feat_ptr[basic_pos + 5 + class_idx];
            float box_prob = box_objectnes*****ox_cls_score;
            if (box_prob > prob_threshold)
            {
                DetectResult obj;
                obj.box.x = x0;
                obj.box.y = y0;
                obj.box.width = w;
                obj.box.height = h;
                obj.classId = class_idx;
                obj.score = box_prob;
                objects.push_back(obj);
            }
        }
    }
}
最终调用该类实现推理就显得特别简单,对图像跟视频都是一样,使用下面的代码:
detector->initConfig(this->settings->getOnnxModelPath(), score, conf);
std::vector<DetectResult> results;
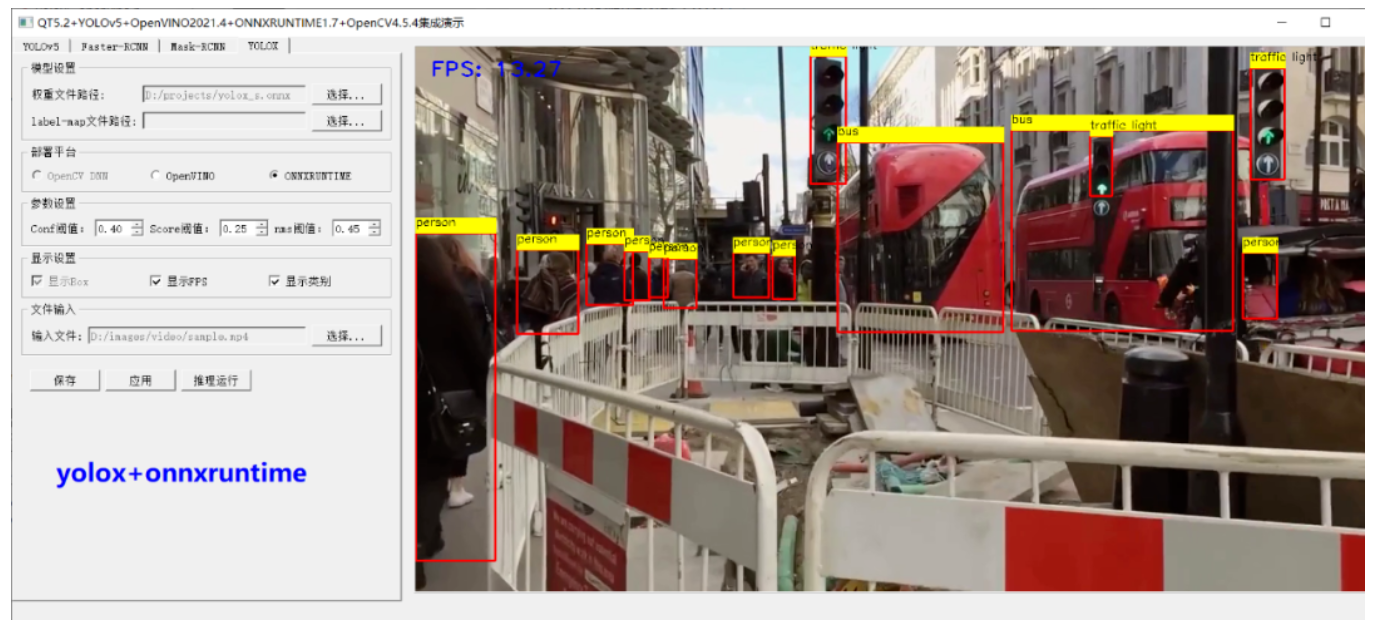
detector->detect(frame, results); 最后我发现在onnxruntime上面也一样可以,基本上重用了大部分的代码,然后把它们与我之前写YOLOv5+QT的演示整合了一下,这样就变成YOLOv5+YOLOx支持OpenVINO/ONNXRUNTIME全部可行的推理,可以自由的通过界面切换!
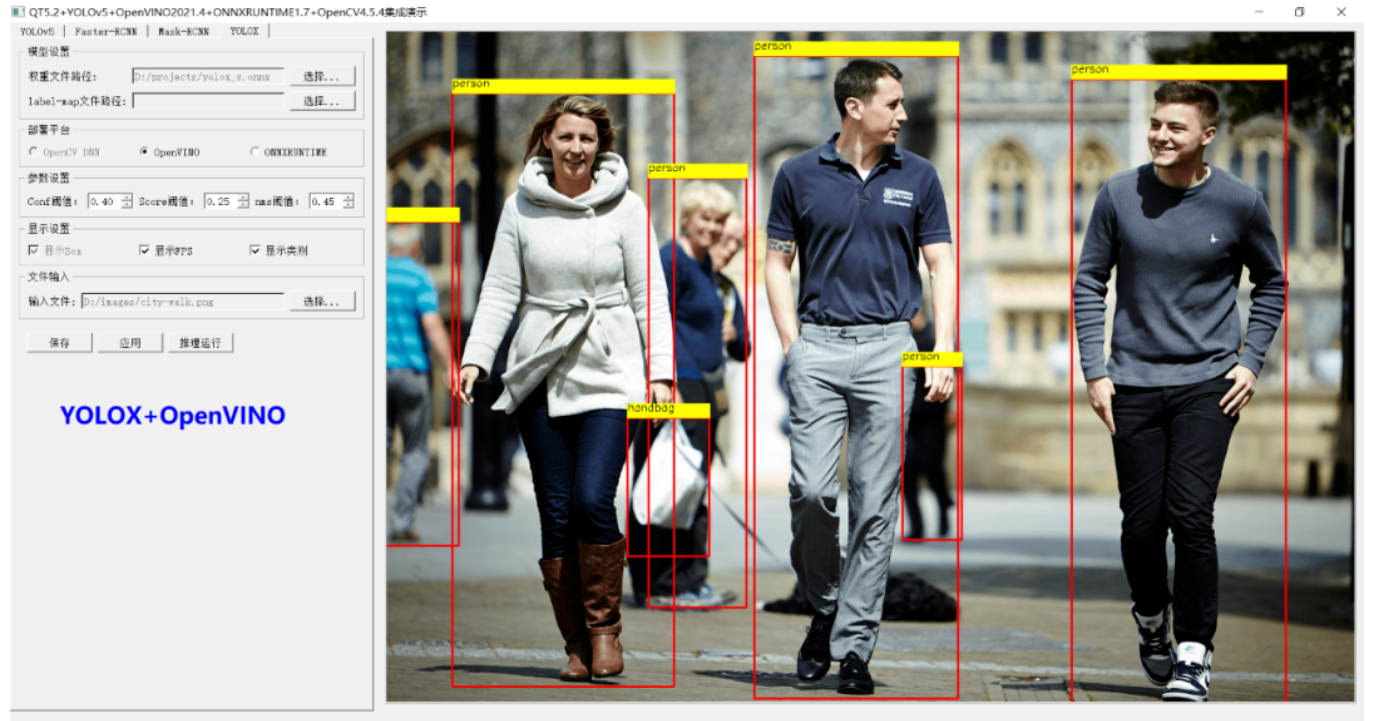
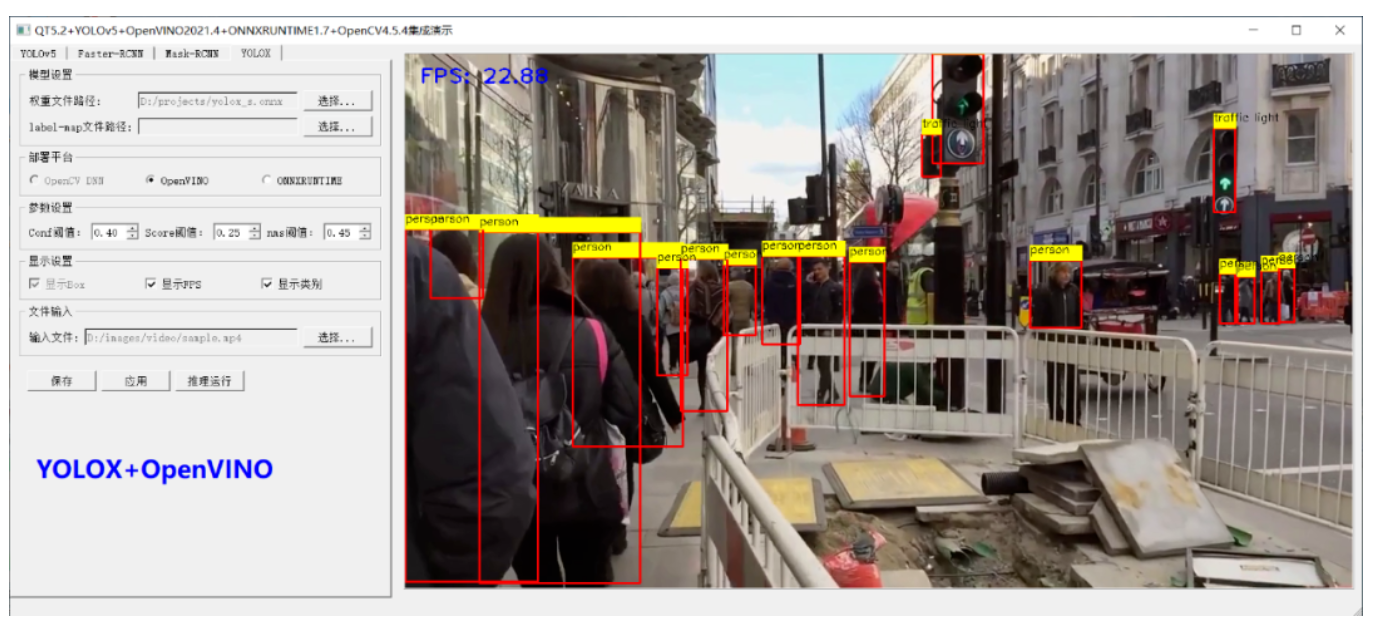
运行结果如下(请允许我show一下界面):
0个评论